Create interstitial ad - Prenly
Interstitial ads are advertisments injected between replica pages in a Prenly publication. Interstitials are dynamically added to the e-paper without being part of the PDF or present in the printed version of the newspaper.
You can at any time create a new interstitial ad in Prenly Workspace. Before please note that there are system requirements to show interstitial ads.
System requirements
HTML. To display your ad the ad content must at minimum be an image tag in HTML (jpg or png).
HTTPS. Due to security concerns, any link outside the e-solution while in paper reading mode must use HTTPS in regards to interstitial ads.
Clickable ad. To have an ad that can be clicked upon by the reader the image tag needs to be surrounded by an anchor tag.
You can use scripts from external ad servers like Google Ad Manager to dynamically display interstitial ads, but keep in mind that this type of advanced integration needs to be thoroughly tested. For this, we have developed a number of features that are described further down this page.
Steps to create the ad
Select "Marketing" and then "Ads" in the left-hand-side menu.
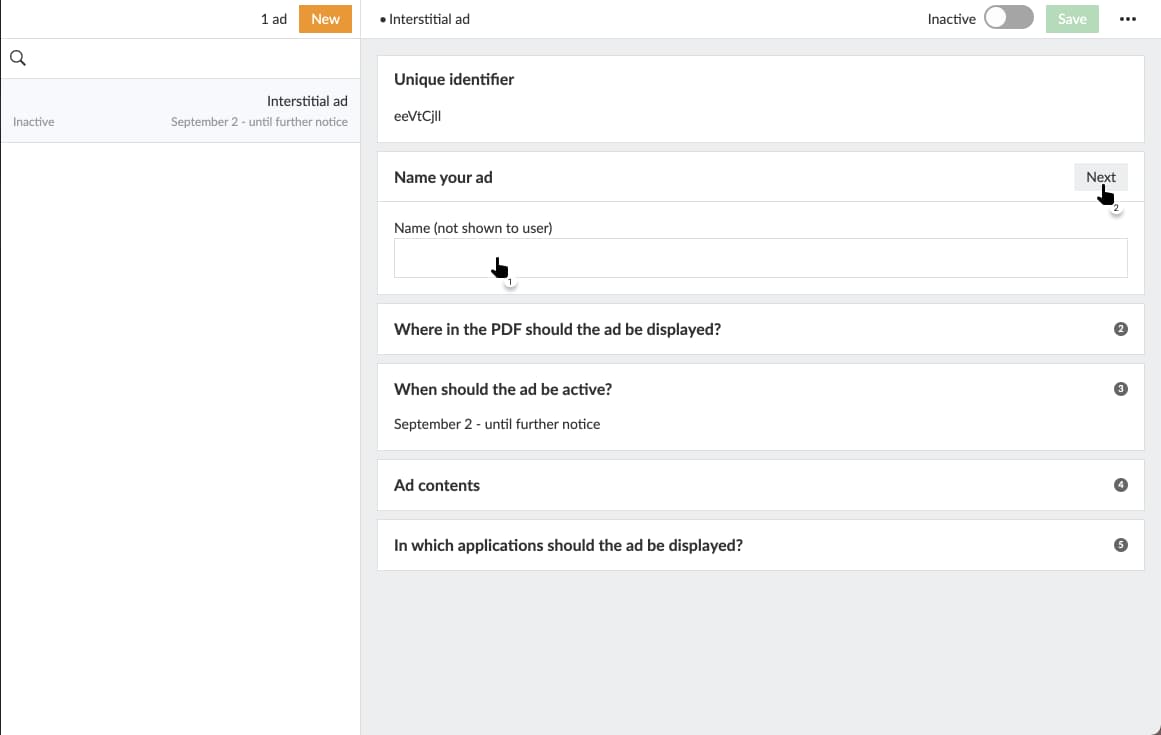
1. Select "New" to create a new interstitial ad.

2. Enter a name for your ad.
This will enable you to easier find the ad in the future and to be able to search for it within the list of ads.
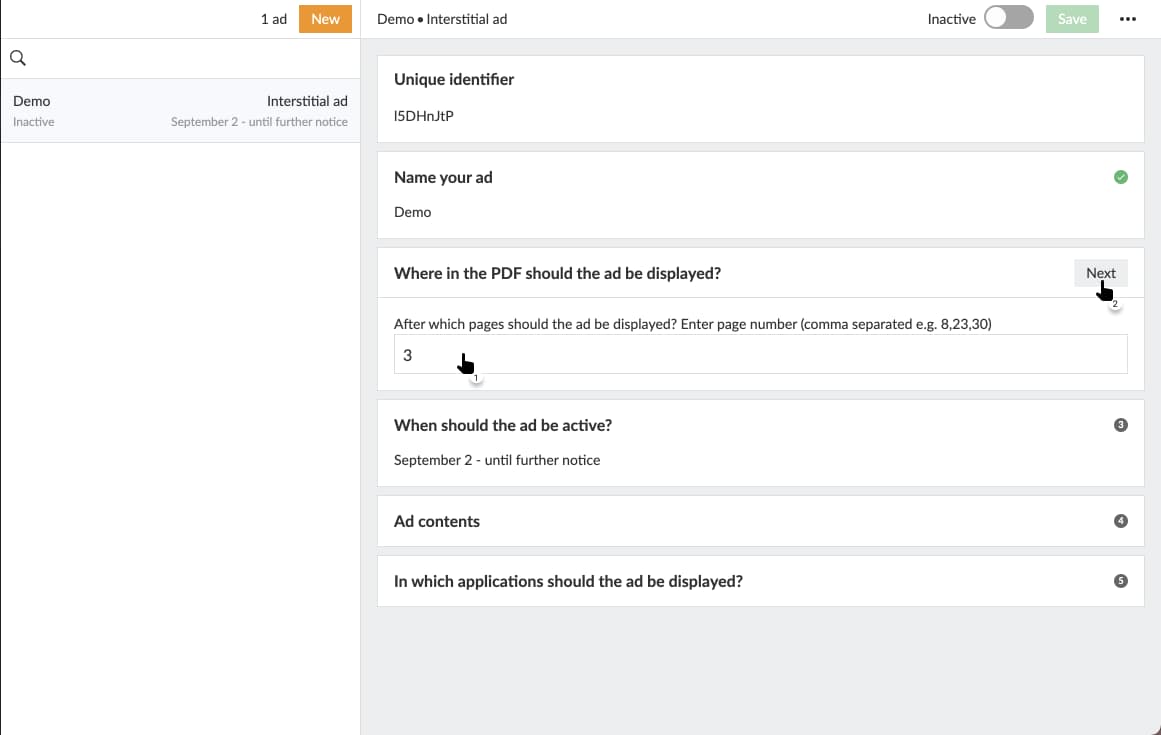
3. Enter after which page your ad should be displayed.
Enter a comma-separated list of pages to enable your ad to be visible after several pages. The ad will be displayed in between after the selected page(s) and prior to the next page spread is displayed, i.e. instead of displaying the next page your ad will be displayed and the next page will be displayed after the ad.
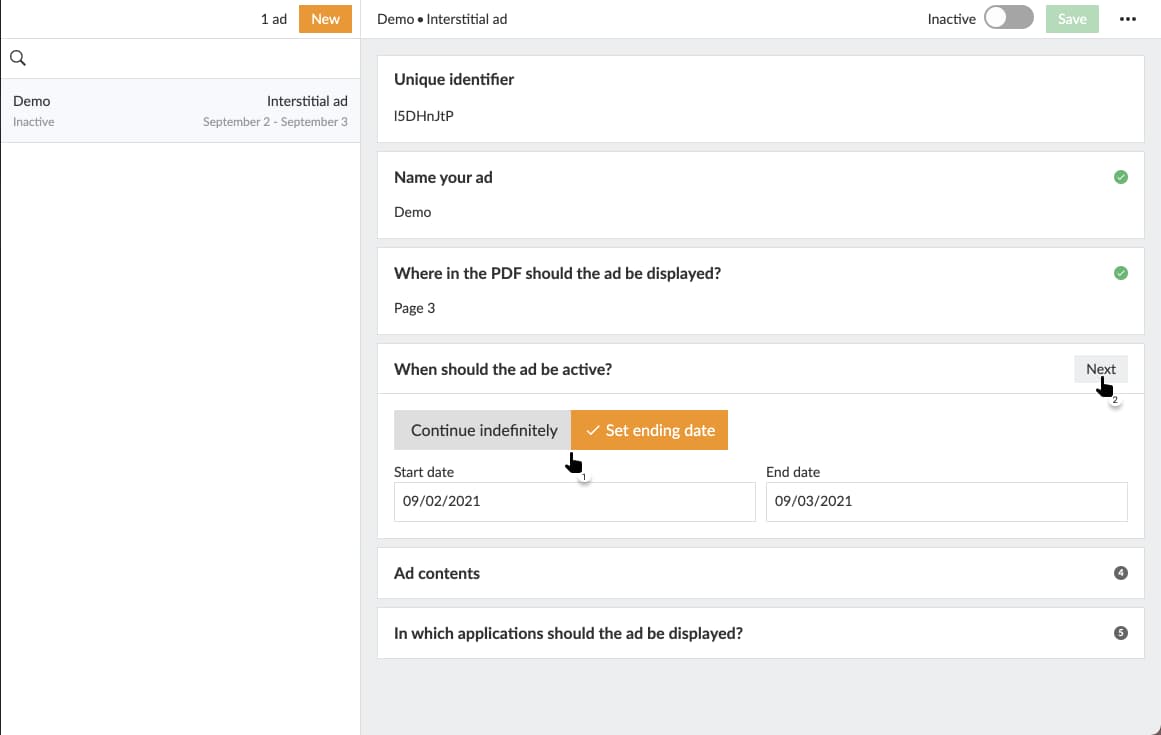
4. Choose a start date
Choose a start date and select whether the ad should be active till manually deactivated, or have a finite end date.
Choose an end date to automatically deactivate your ad at midnight the day after the entered end date.
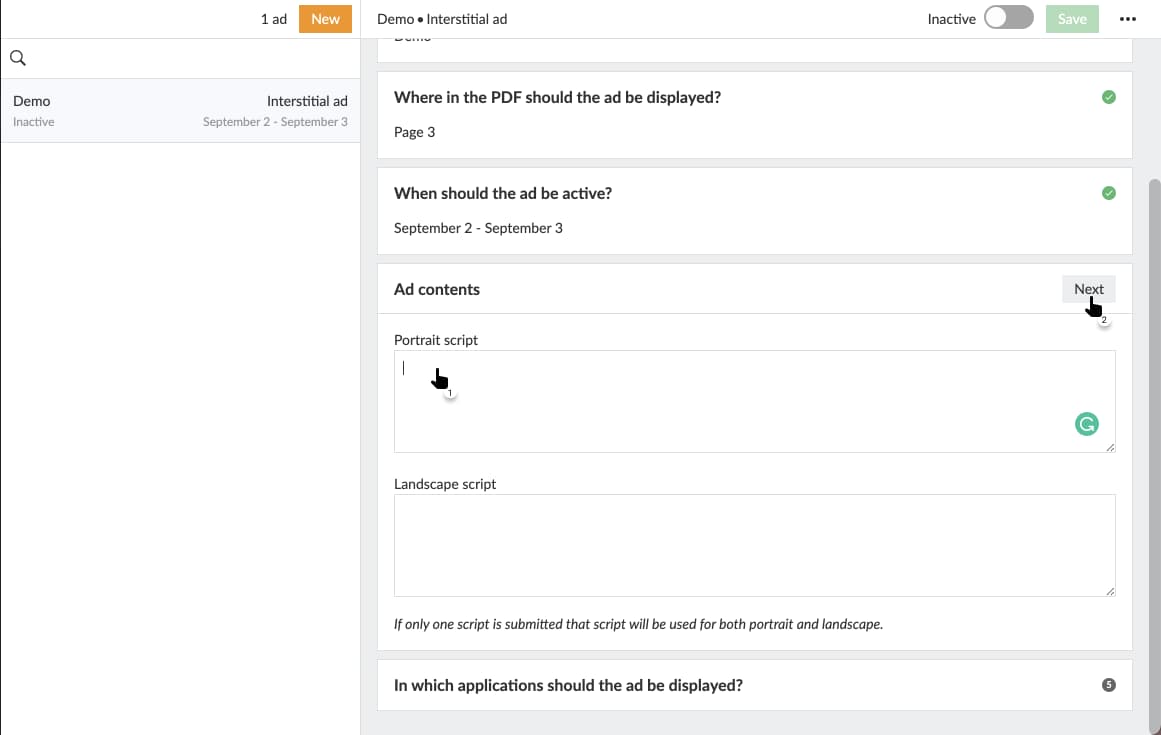
5. Enter a HTML image tag
This will be used to render your ad image. The image source (src-attribute) needs to use the HTTPS-protocol due to safety reasons.
Valid image formats includes eg jpg and png.
Note that PDF is not a valid format for images.
If your ad should be clickable, as in if you want the reader to be able to click on the ad image and be navigated to the advertiser's web page, surround the image tag with an anchor tag () which anchor reference (href-attribute needs to use HTTPS-protocol as well.
Choose whether you want to use a different image between portrait and landscape hand-held mode. You need to select either mode at a minimum, but you can select both. If you choose to enter one, say portrait mode, Prenly will use the same code in displaying your ad to landscape hand-held devices.
What is HTTPS?
HTTPS is encrypted communication between the web browser (client) and web server and is noted as "https://".
Compare http://example.com/ and https://example.com/. Many web browsers will signal that the communication is encrypted via HTTPS by adding a padlock icon to the URL bar to indicate that the communication is secure.
Why does Prenly require HTTPS?
Android disallows opening HTTP-links from an app. By extent of this Prenly will require the links existing an app to use HTTPS. Readers will also get a safer reading experience by using HTTPS as the communication is encrypted.
Prenly supports JavaScript code which enables you to have dynamic ad content. Any valid JavaScript is accepted, but the code needs to yield an image tag and, optionally, a surrounding anchor tag, once executed.
Prenly will not validate your code. It is recommended that you try your code on an HTML page prior to activating your ad.
Example code for images:
Portrait:
< img
src="{INSERT-IMAGE-SRC}"
alt="Advertisement"
width="1100"
height="1700"
style="display: block; width: 100%; max-width: 100vw; max-height: 100vh; object-fit: contain; margin: 0 auto;"
>
Landscape:
< img
src="{INSERT-IMAGE-SRC}"
alt="Advertisement"
width="1700"
height="1100"
style="display: block; width: 100%; max-width: 100vw; max-height: 100vh; object-fit: contain; margin: 0 auto;"
>
Example code for MP4-videos
Note that H.264 encoded videos are mandatory to work in Safari.
If you are using javascript from an ad server you may use some additional features available in the web reader from May 2025, and in the iOS app from version 14.1.1, and in Android from version 12.10.0. These new additions is so far (May 2025) used by one customer using Google Ad Manager, and it is up to your integration with your ad server to try out what works for you.
The new features enables the ad script to pick up the user's consent settings in the PrenlyUserConsent object. With the PrenlyAd object it is possible to instruct the app to hide an empty ad and get info about the baseurl and title name. See technical details at the bottom of this page.
6. Select which application should display your ad.
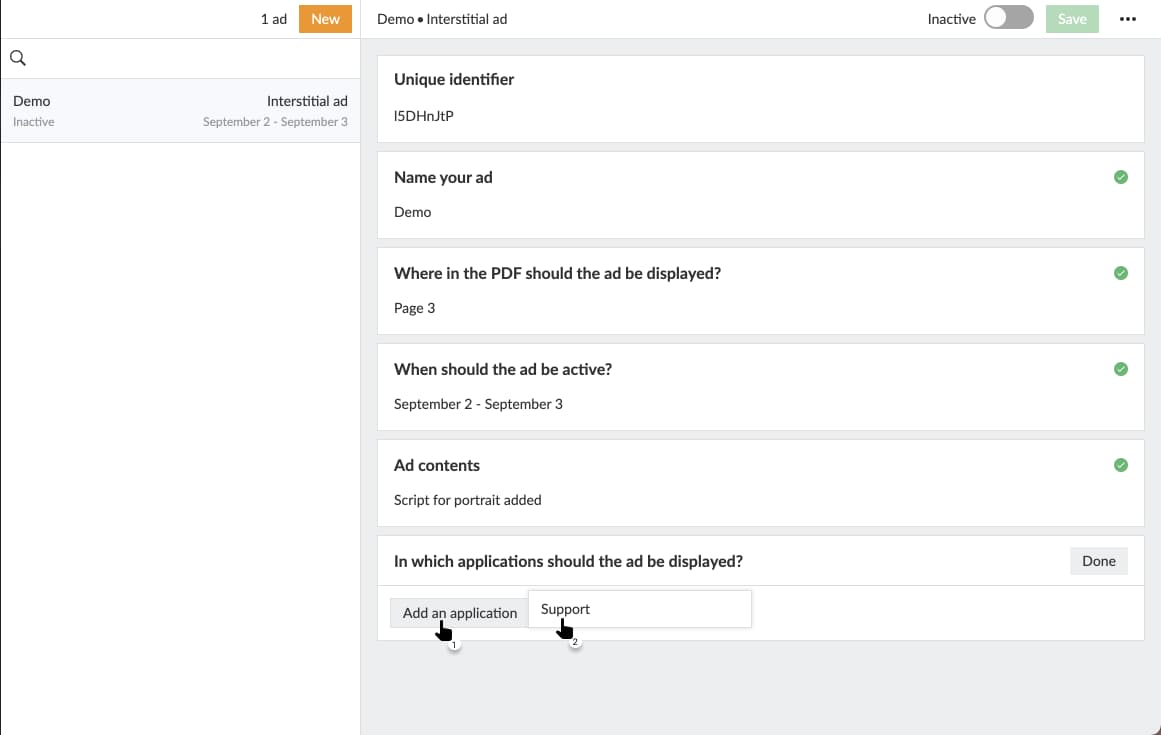
7. Select which titles should display your ad.

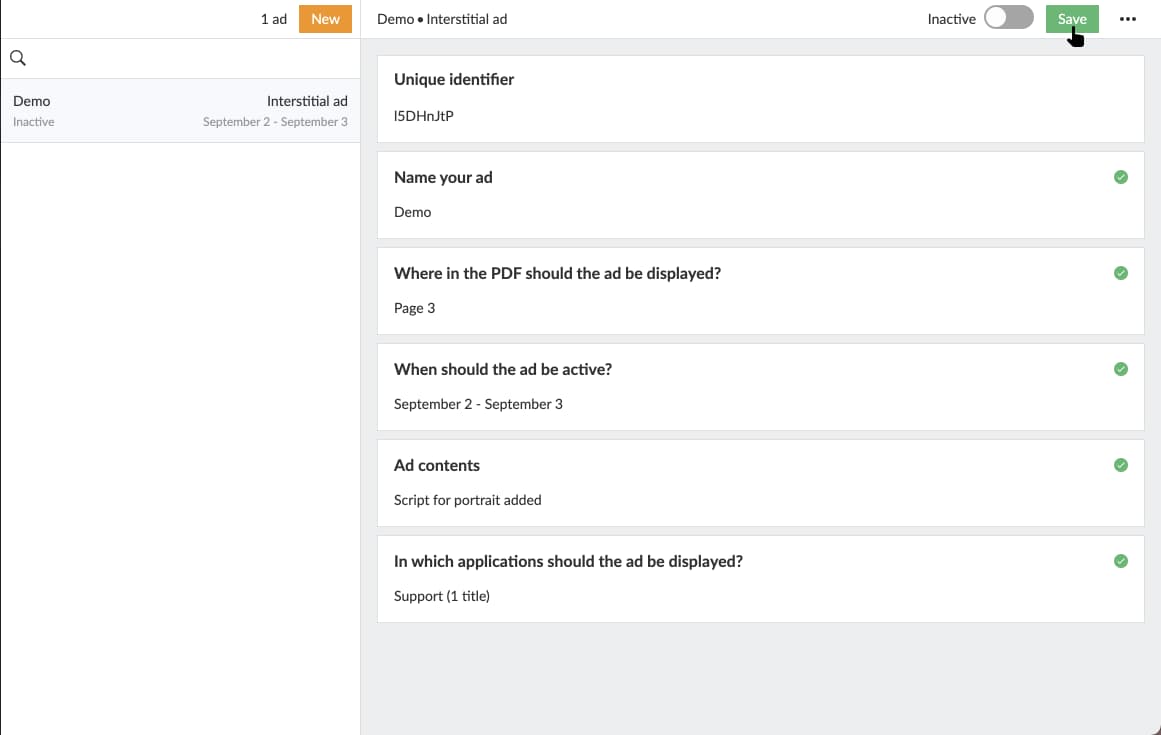
8. Save your settings by selecting "Save".
If the icon is colour-blurred after the last set then you have missed configuring a section. Look for a red plop in the right-hand-side corner for each section. Select the misconfigured section and continue the configuration from there.
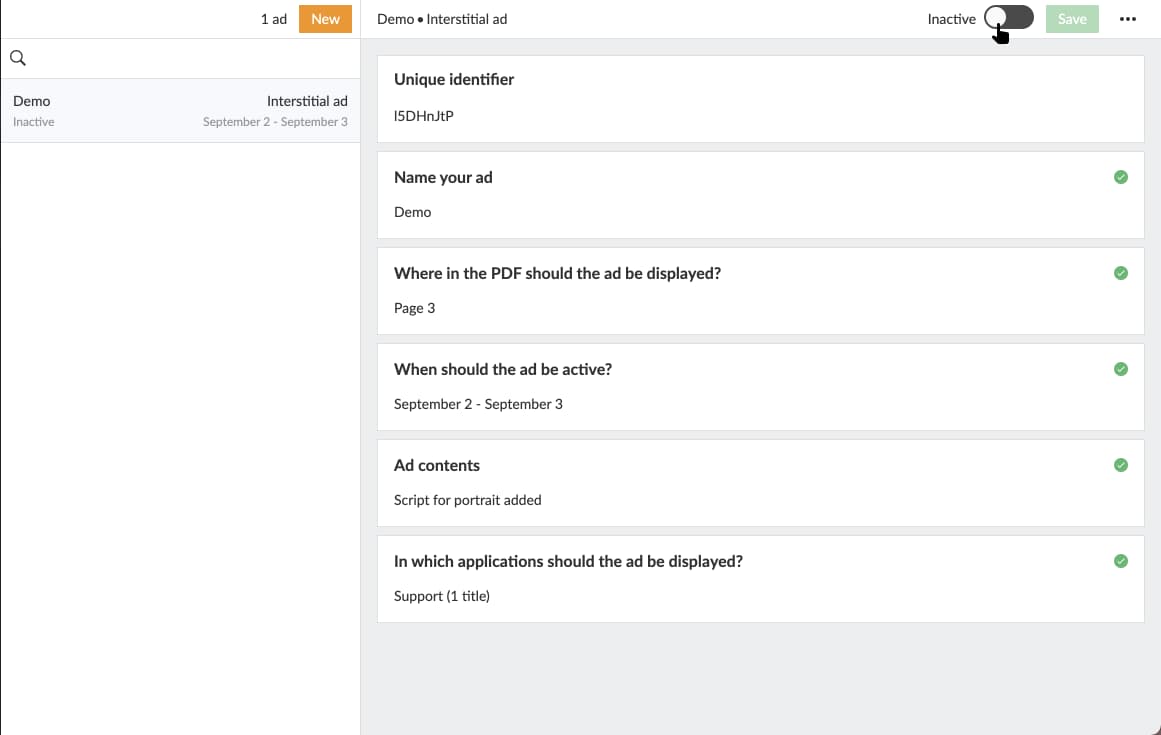
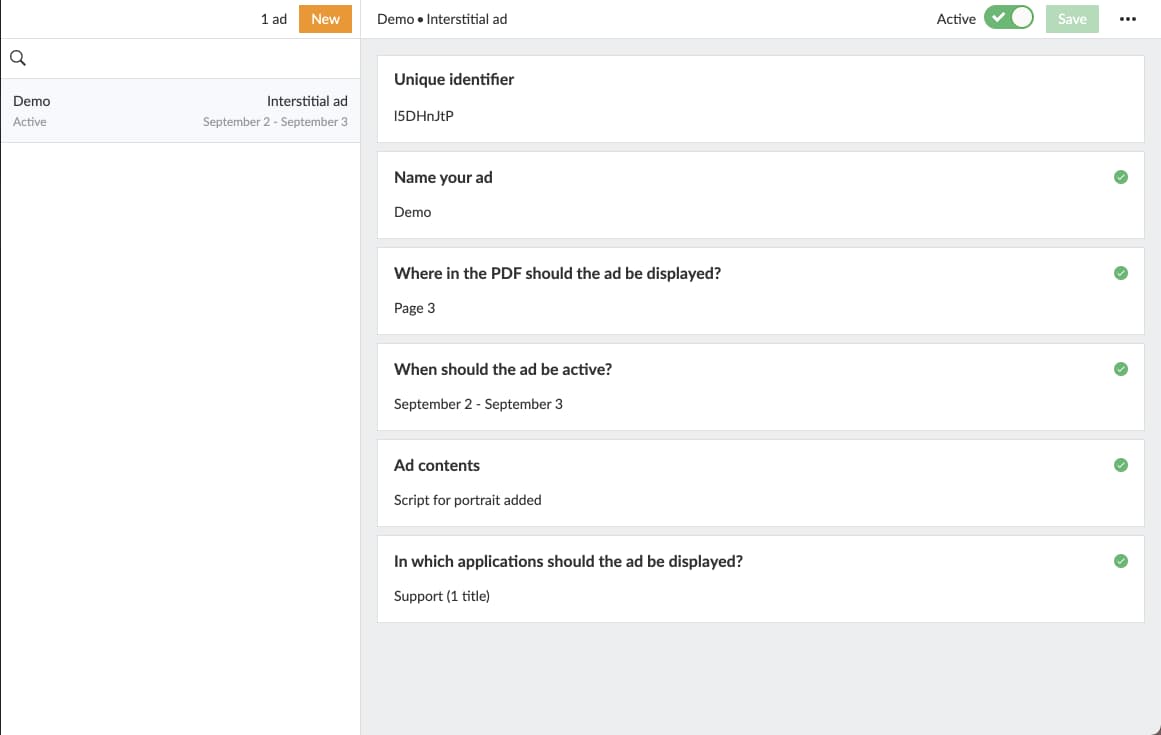
9. Activate your ad by toggle the switch in the top-right corner.
If the ad is inactive then you will activate the ad. If the ad is active then you will deactivate it.
Only active ads will be displayable to your readers as Prenly will send it out to be displayed in the configured application publication and page in the paper reading mode. Inactive ads will not be displayed when the reader swipes past the marked page.
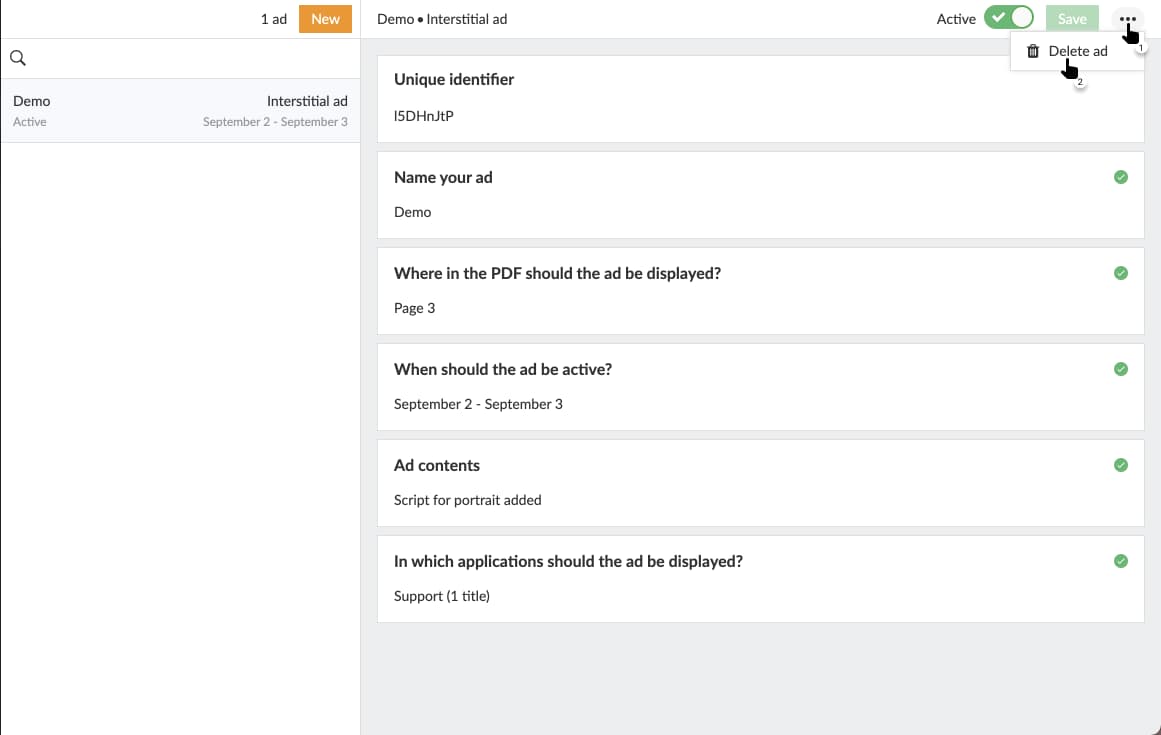
10. Delete ad.
Select the three-dot menu in the top-right corner and select "Delete ad" to delete the currently chosen ad. The ad will be removed from Prenly Workspace. If the ad was active prior to deletion the ad will first be deactivated before it is deleted.
Select the video below to see how to create an interstitial ad as a video guide.
Integration with external ad systems
It is possible to dynamically load interstitial ads from external ad systems via javascript. We have developed several advanced additional functions for a publisher using Google Ad Manager but they can probably also be used by other ad servers. These features require good insight into your ad system and its capabilities as well as knowledge of javascript and may not work for everyone.
PrenlyAd
The PrenlyAd object contains the function "collapseAd" that you can use in your script to notify the app to hide an ad slot when the ad system cannot deliver an ad. Instead of showing an empty ad slot, the entire ad space is then hidden.
You can capture the "baseUrl" and "titleSlug" from the ad's position in the e-paper to create a virtual url in the script that you can use to target your ad from the ad system so that it appears in a specified title in an app.
Example of how to create a virtual URL that can be used for targeting.
url = window.PrenlyAd.baseUrl + "/p/" + window.PrenlyAd.titleSlug;
window.PrenlyAd = {
collapseAd: function // function which should be invoked to notify native app that ad is collapsed
titleSlug: string // title slug which identifies title given interstitial ad is linked to
baseUrl: string // base url of the app
}
PrenlyUserConsent
You can use the PrenlyUserContent object to capture the user's consent settings and based on these determine whether you want to load dynamic ads from a third party (when consent to ads is present) or internal static ads (when consent is rejected).
The object contains parameters to pass on the user's choice from the CMP dialog and TC string if present.
In cases where the iOS app has an ATT prompt (App Tracking Transparency) which is sometimes required by Apple, the parameter "att_granted" is sent with it.
window.PrenlyUserConsent = {
cmp: string, // CMP module name
cmp_vendor_grants: dictionary?, // dictionary containing vendor grants info if available
cmp_purpose_grants: dictionary?, // dictionary containing purpose grants if CMP provider supports it
prenly_purpose_grants: dictionary?, // only available if app uses Prenly CMP as provider
tc_string: string, // TC string if CMP provider supports it
att_granted: boolean // only if app has ATT configured
}