Write in Prenly - Prenly
Regardless of what you want to say, it is easy to say it with Prenly! To write in Prenly is as simple as creating a new article and starting writing in a selected publication.
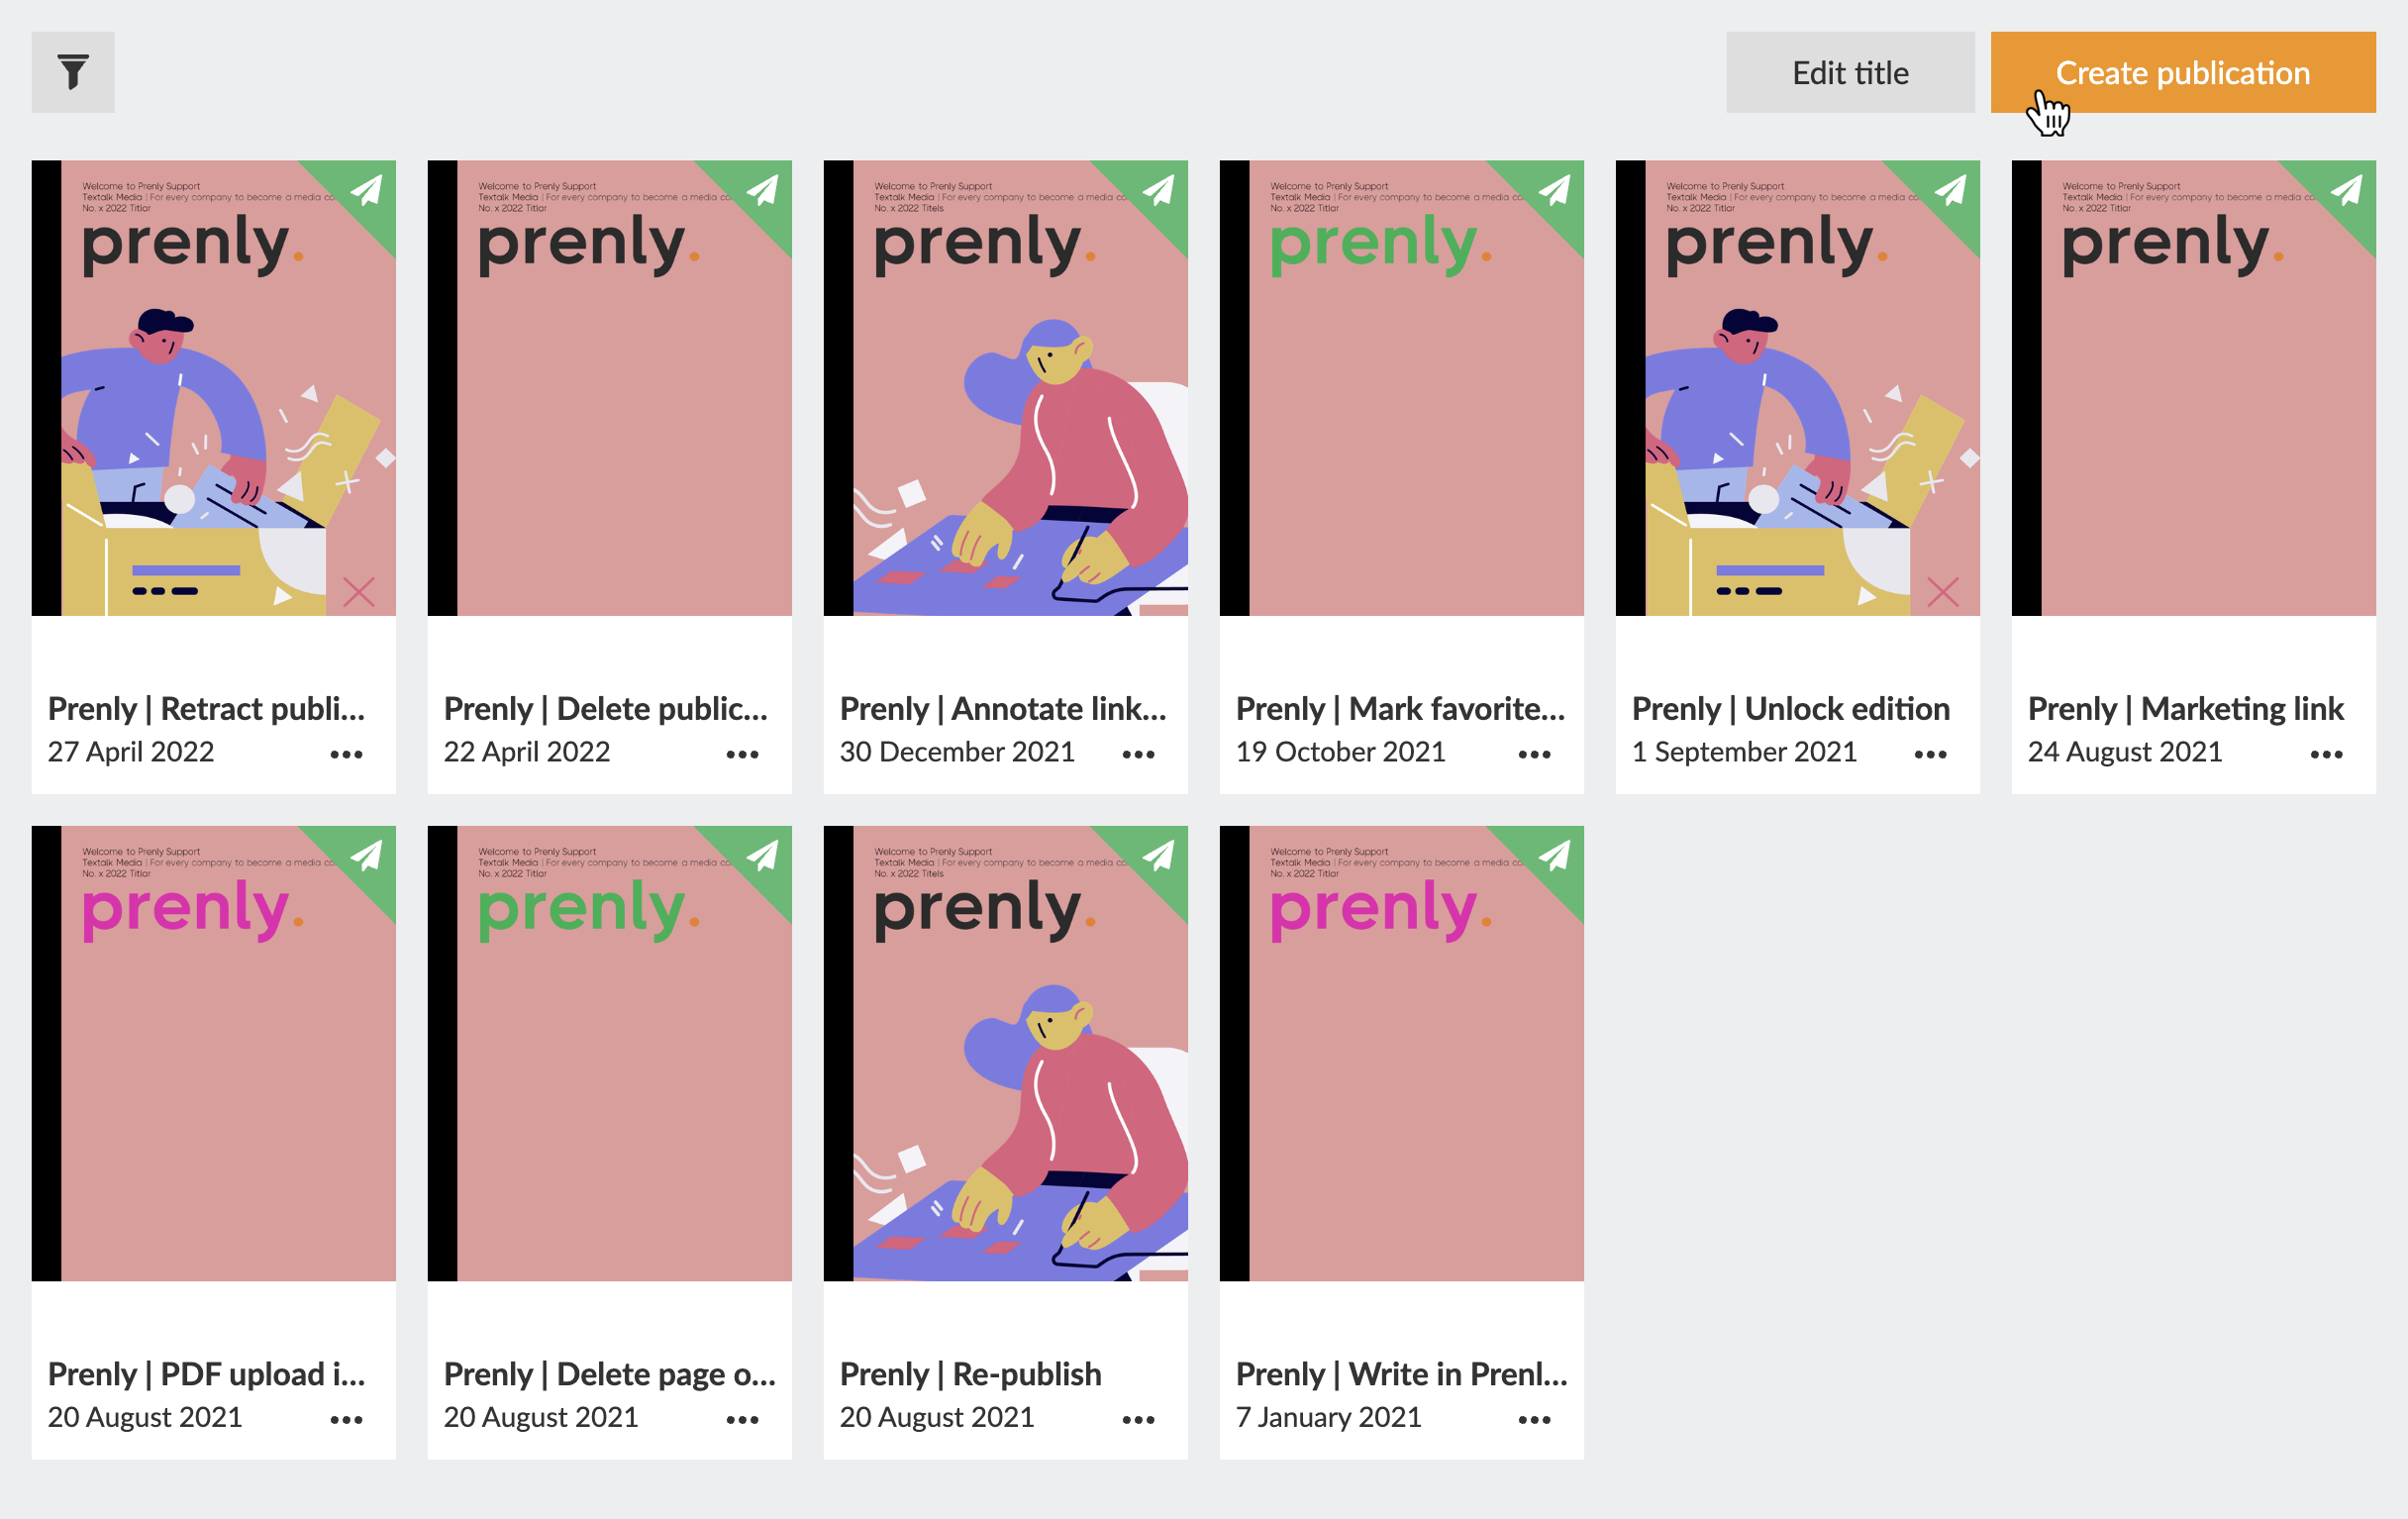
Select publication
Regardless of what you want to write, you need to select a publication to host your article. Select the publication of the Prenly title of your choice by clicking the publication card either on the cover image or name field.
If the publication does not exist, select the button "Create publication" to create a new publication on the selected Prenly title. Enter a delivery date and name. Select whether the publication should be public or "Same as title" to use the title's general read permissions settings. Once you are happy with the configuration, select "Create" to create your new publication. Prenly will, by default, use your chosen delivery date as the publication name when Prenly automatically creates a new publication; but you are free to select whatever name you would like.
 Select "Create publication" to create a new publication.
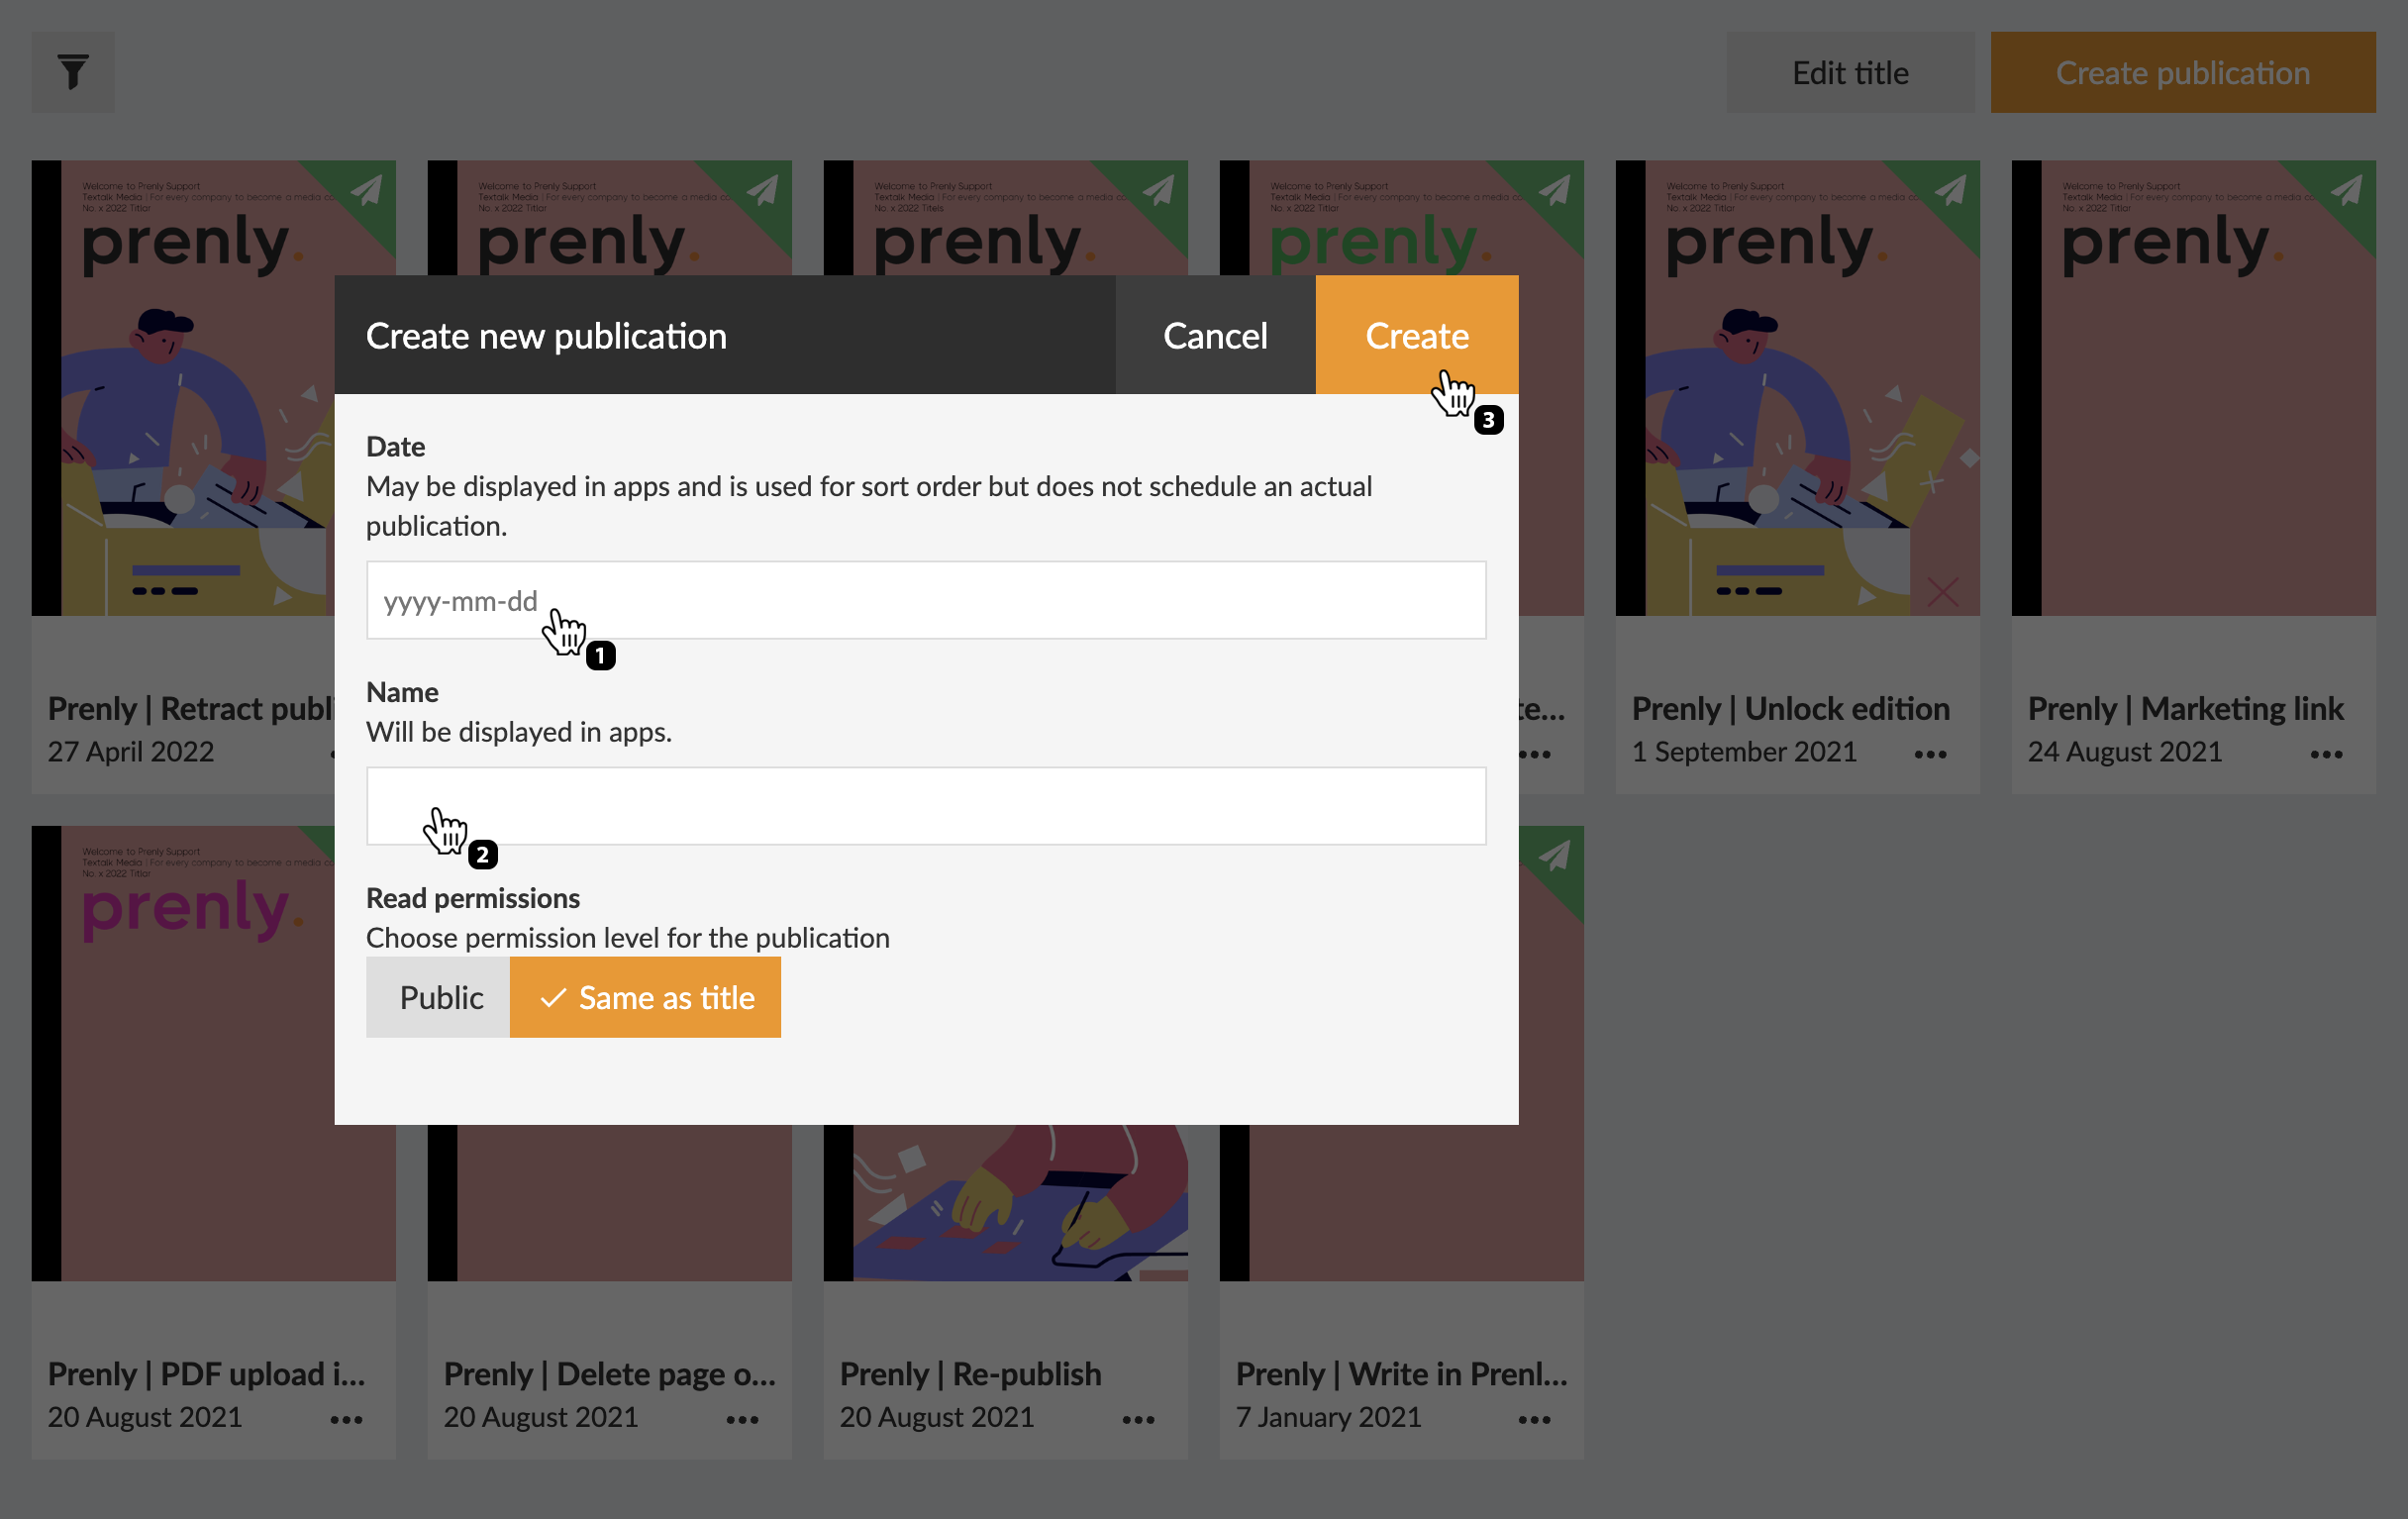 Configure your new publication by entering a delivery date and a name prior to creating it by selecting the button "Create".
You will enter Prenly Editor once you have selected a publication.
Prenly Editor
Select the panel "Articles" if it is not already selected.
Create your first article by selecting the button "Create new article". Prenly will create a new blank article and you can immediately start to fill it with your content.
Select the button labelled "+ New content" and then select "New article" from the drop-down menu to create a new article if you have articles from before.
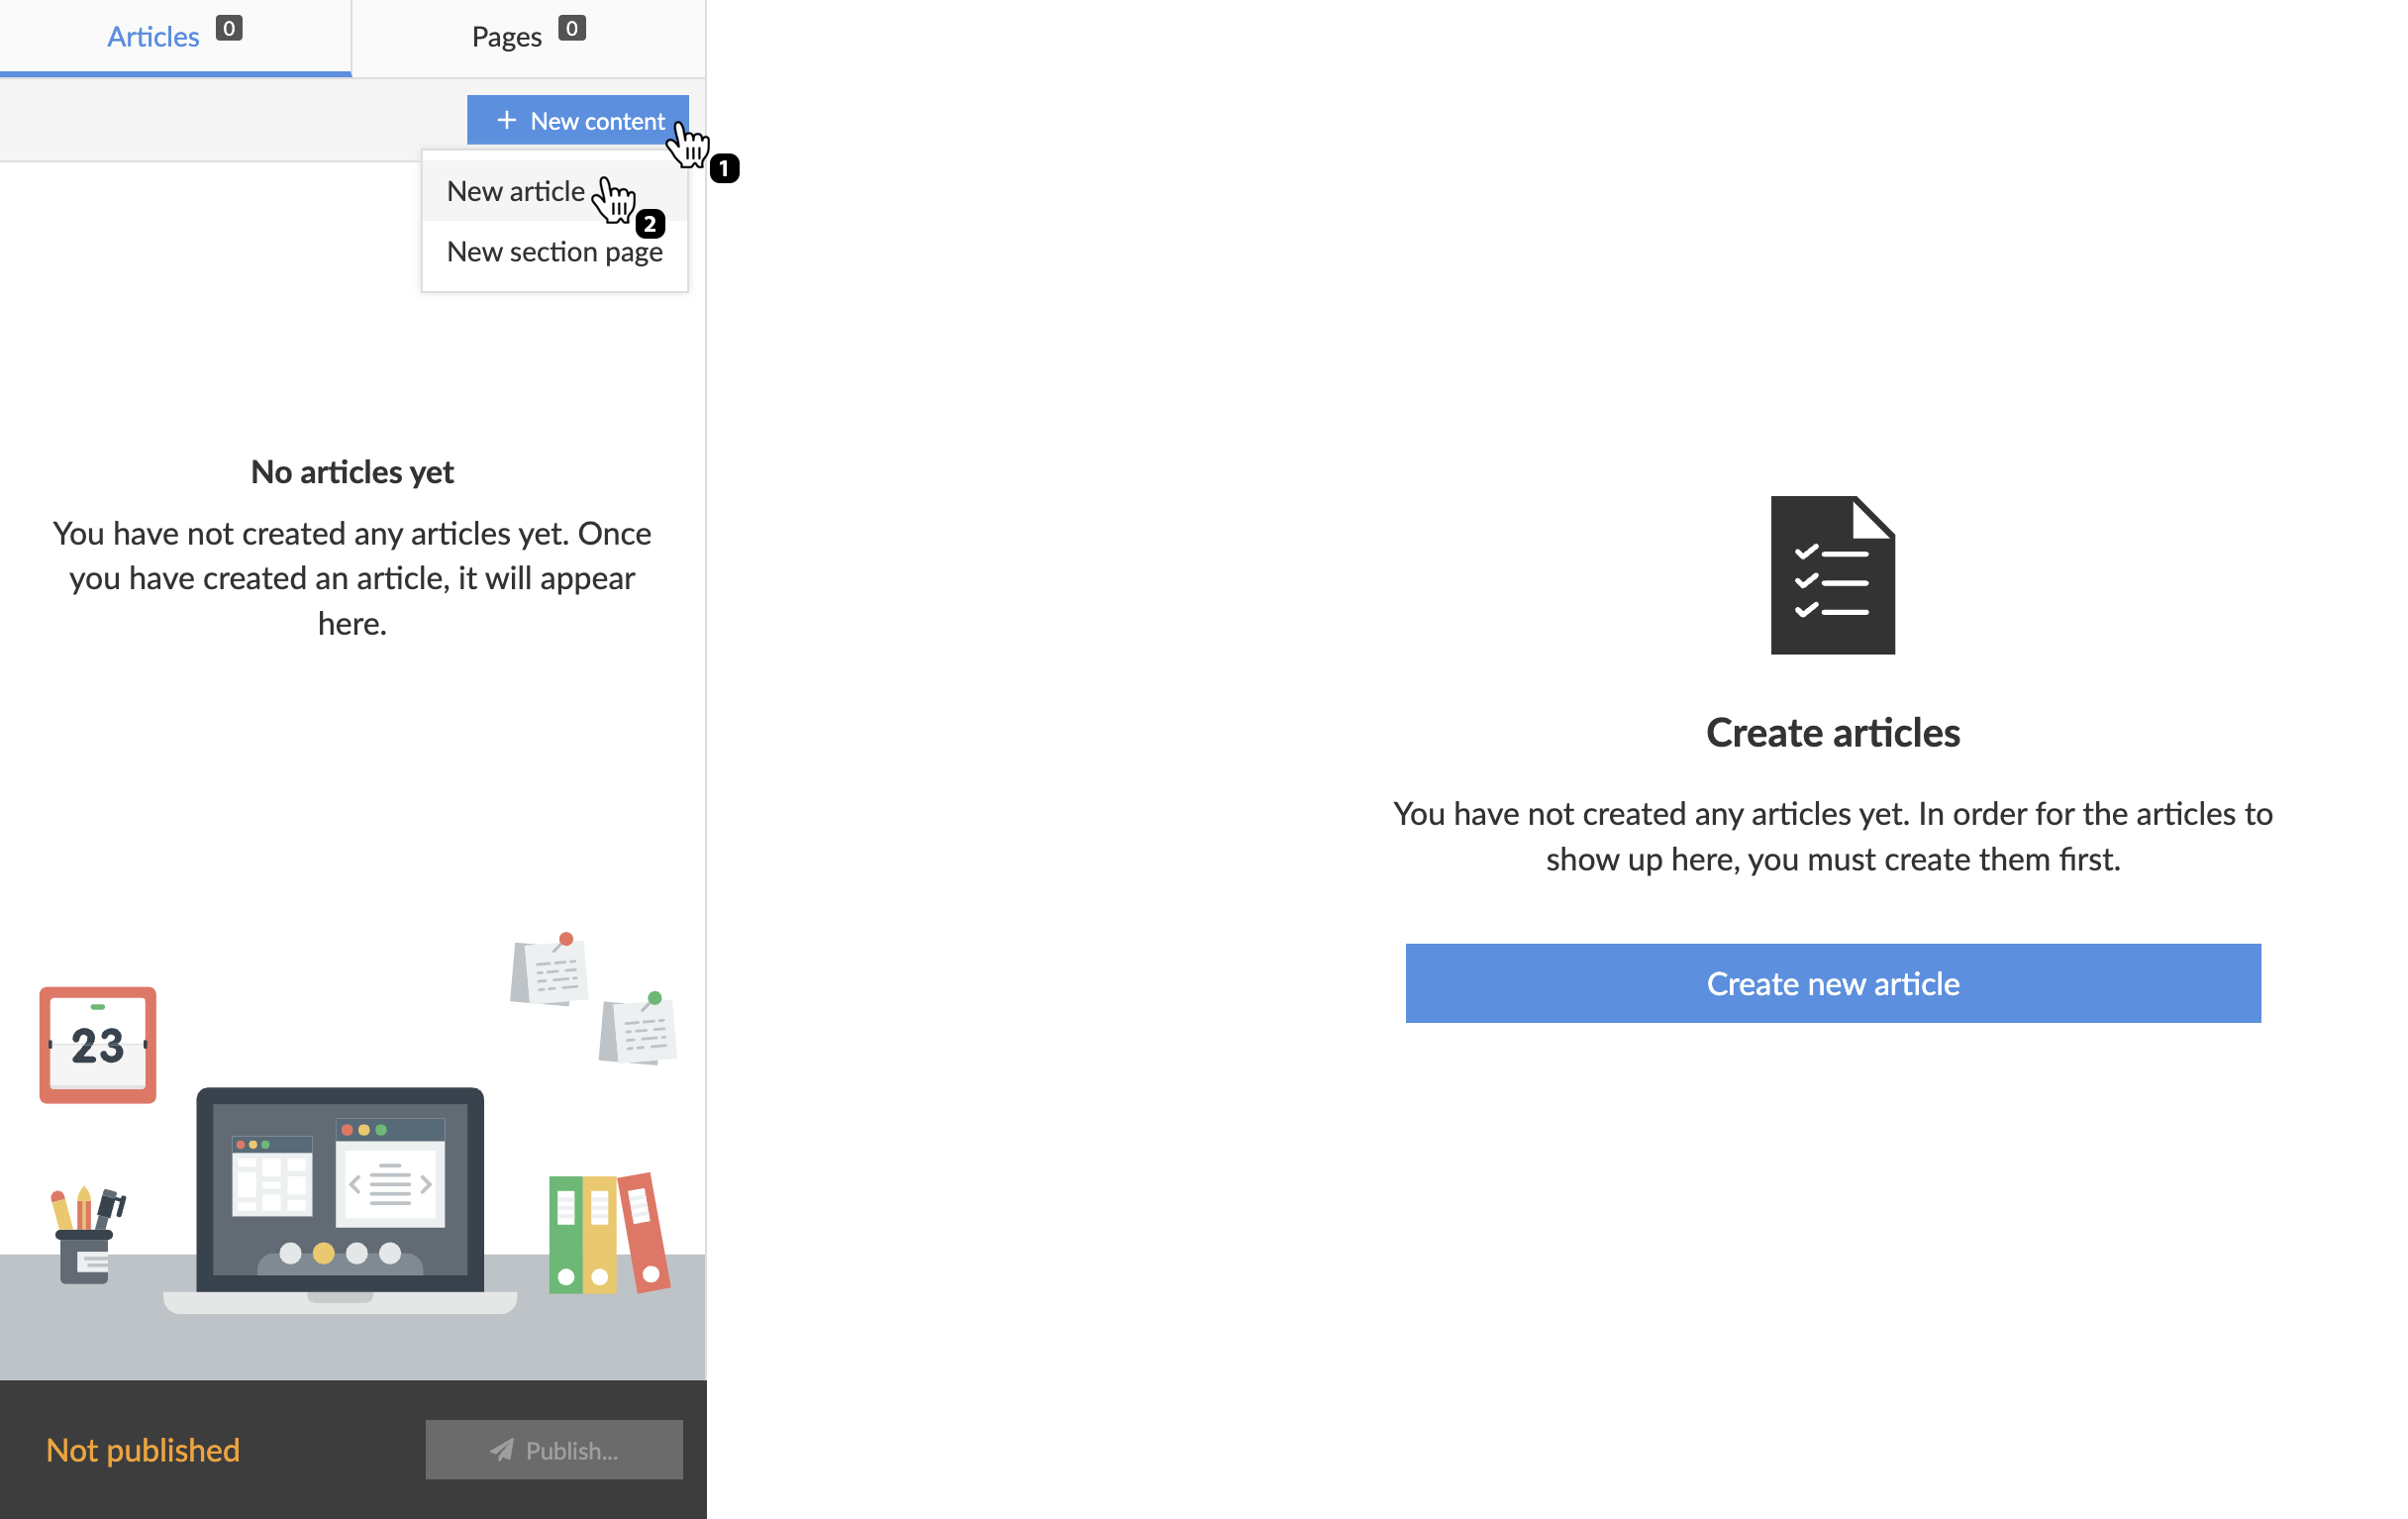 Select "+ New content" and then "New article" to create a new article.
Content fragments
All content disregarding type in Prenly exists as content fragments. There are two top-level fragment types; media, and text. Select the top-level fragment of your choice:
* Select video to add a media container for a video;
* Select image to add a new media container for an image;
* Select text by writing a text of your choice;
You can re-arrange the order of your content fragment once it has been created. You re-arrange it by selecting the three-line anchor on the right-hand side of the context fragment and then dragging it to the new position.
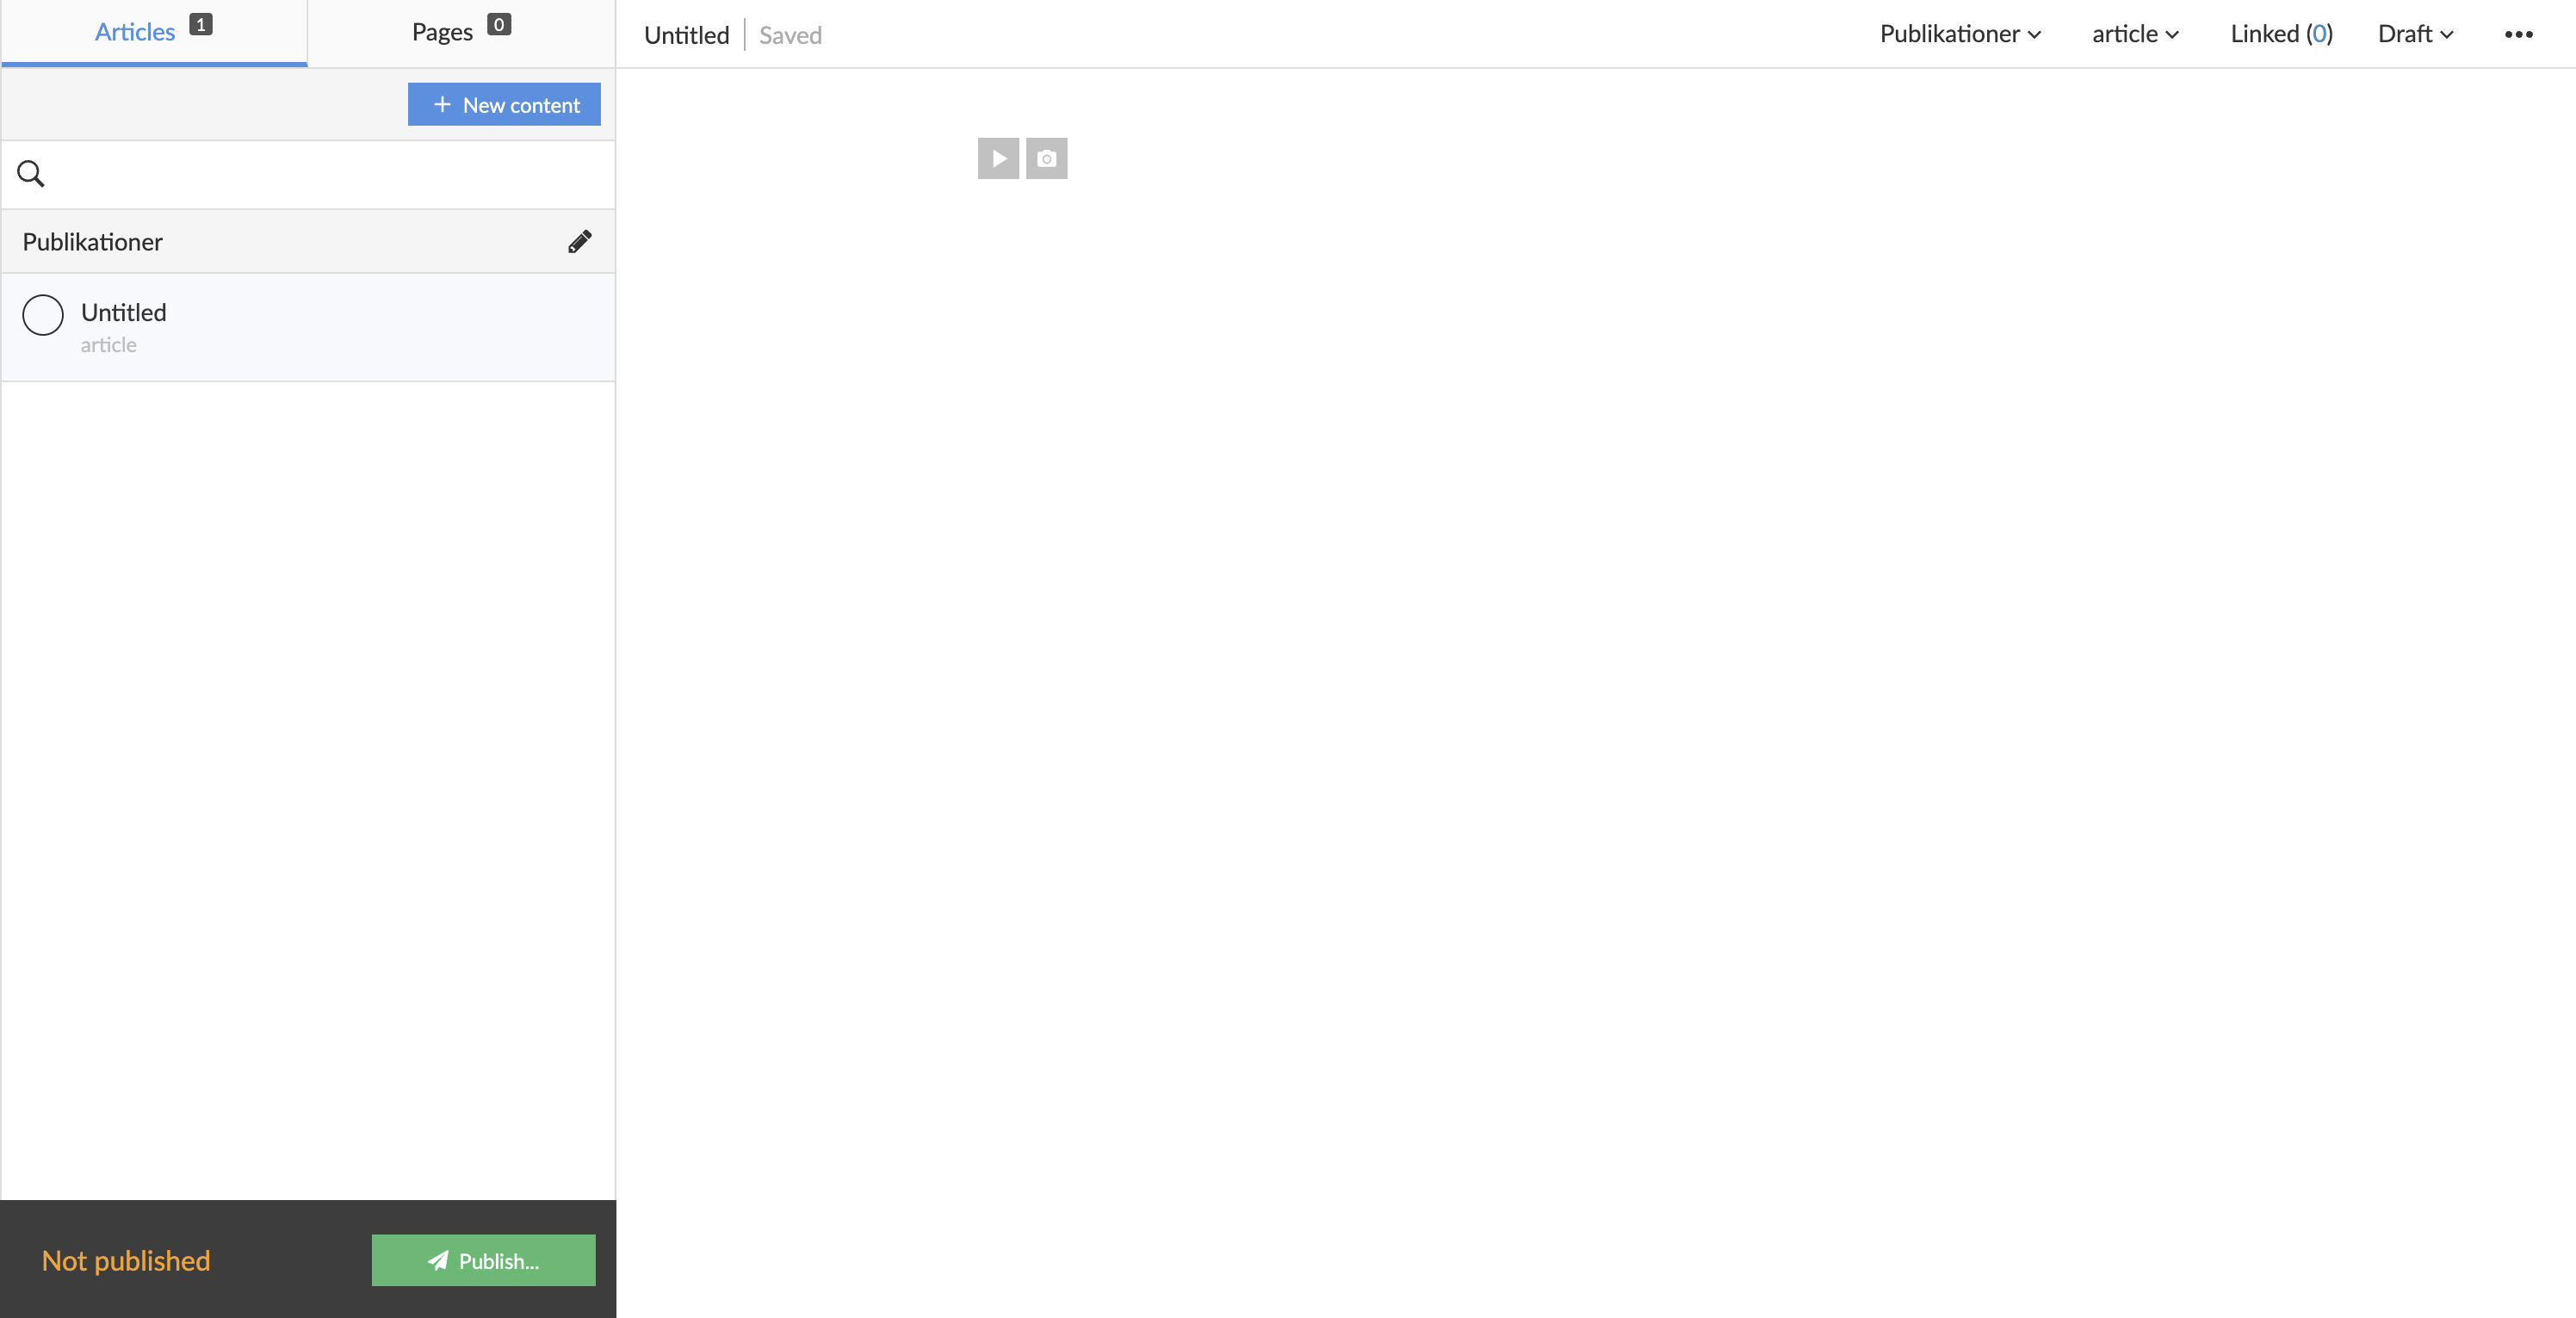 View over a newly created unnamed article.
New content fragment
Create a new content fragment by selecting the previous content fragment, and create a new content fragment by selecting the ENTER key on your keyboard.
You can delete a content fragment by selecting it and then BACKSPACE till the content fragment is empty. Prenly will automatically delete the content fragment on the final BACKSPACE on the active content fragment.
Media container
Each media container, whether if you add video or image, will let you add more media content, re-arrange the order if more than one media is added, set media description, and remove media content.
You can adjust the size of the media container by setting the width. Select the container and then select an inline or full-width size. Prenly will, by default, select the full-width size on media container creation.
Prenly will automatically display a media carousel of your media container if it contains more than one media. Your readers can then select the next or previous media content by the pagination arrows.
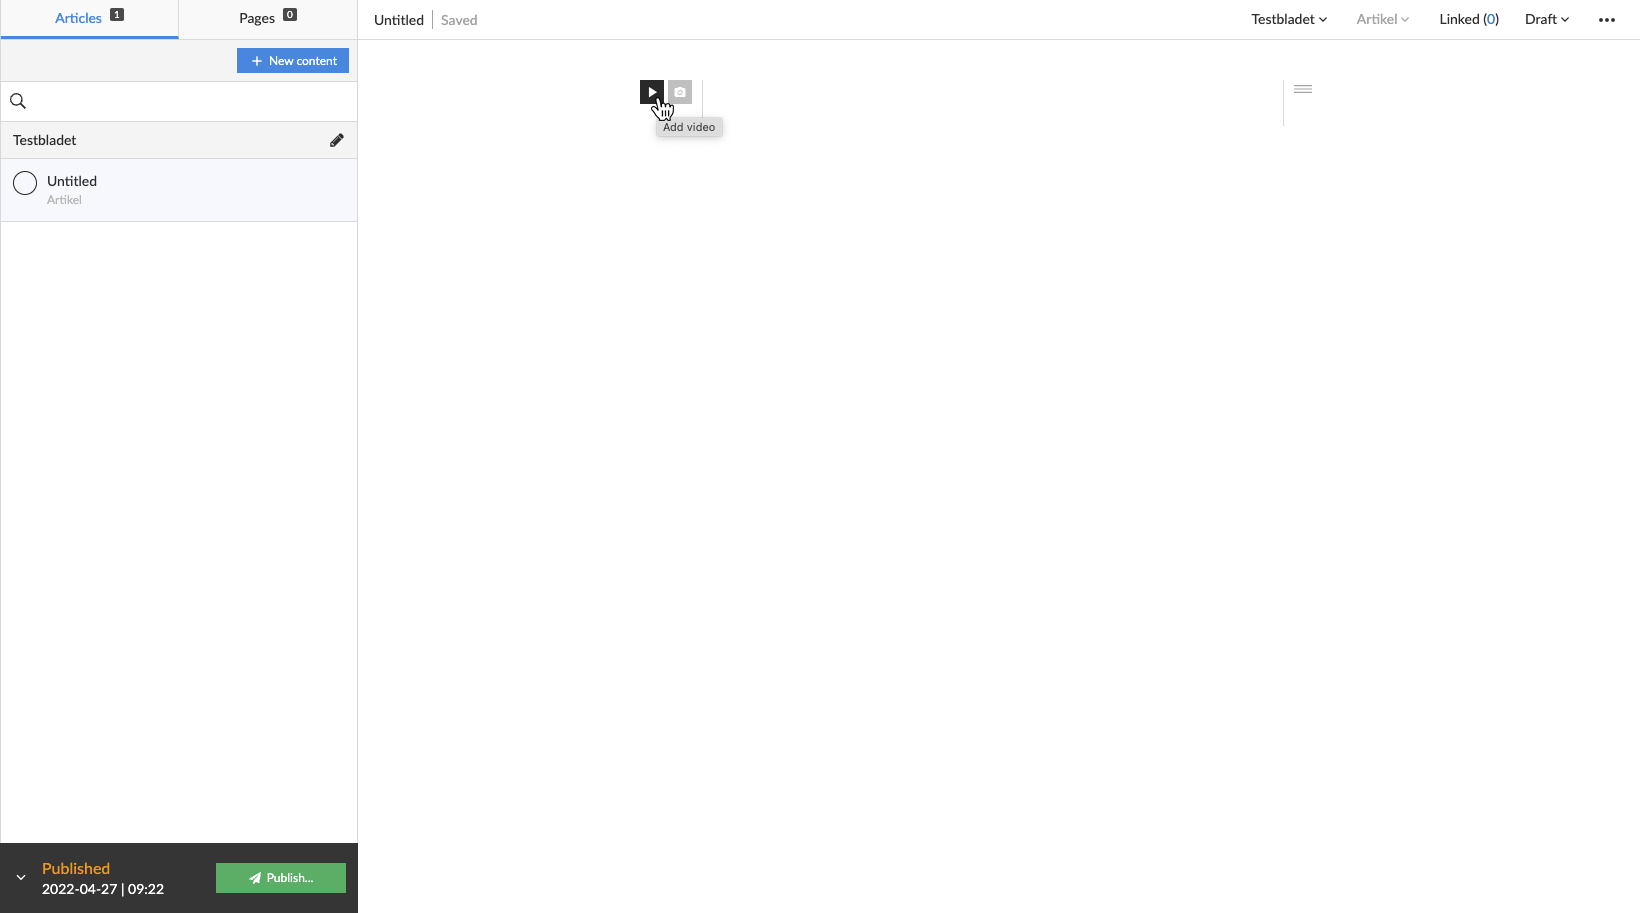
Video
Once in the media container, create a new video fragment by entering a URL to an embedded video player, e.g. YouTube.
Prenly will detect what type of video host you have selected and do some setup in the background. Once it has been completed, select the button "Add" to add your new embedded video as a new video container fragment or select "Cancel" to abort.
Prenly will extract a description text from your video but, if you want, you can edit the text by selecting the description under the video.
 Select "Add Video" to add a new video media container.
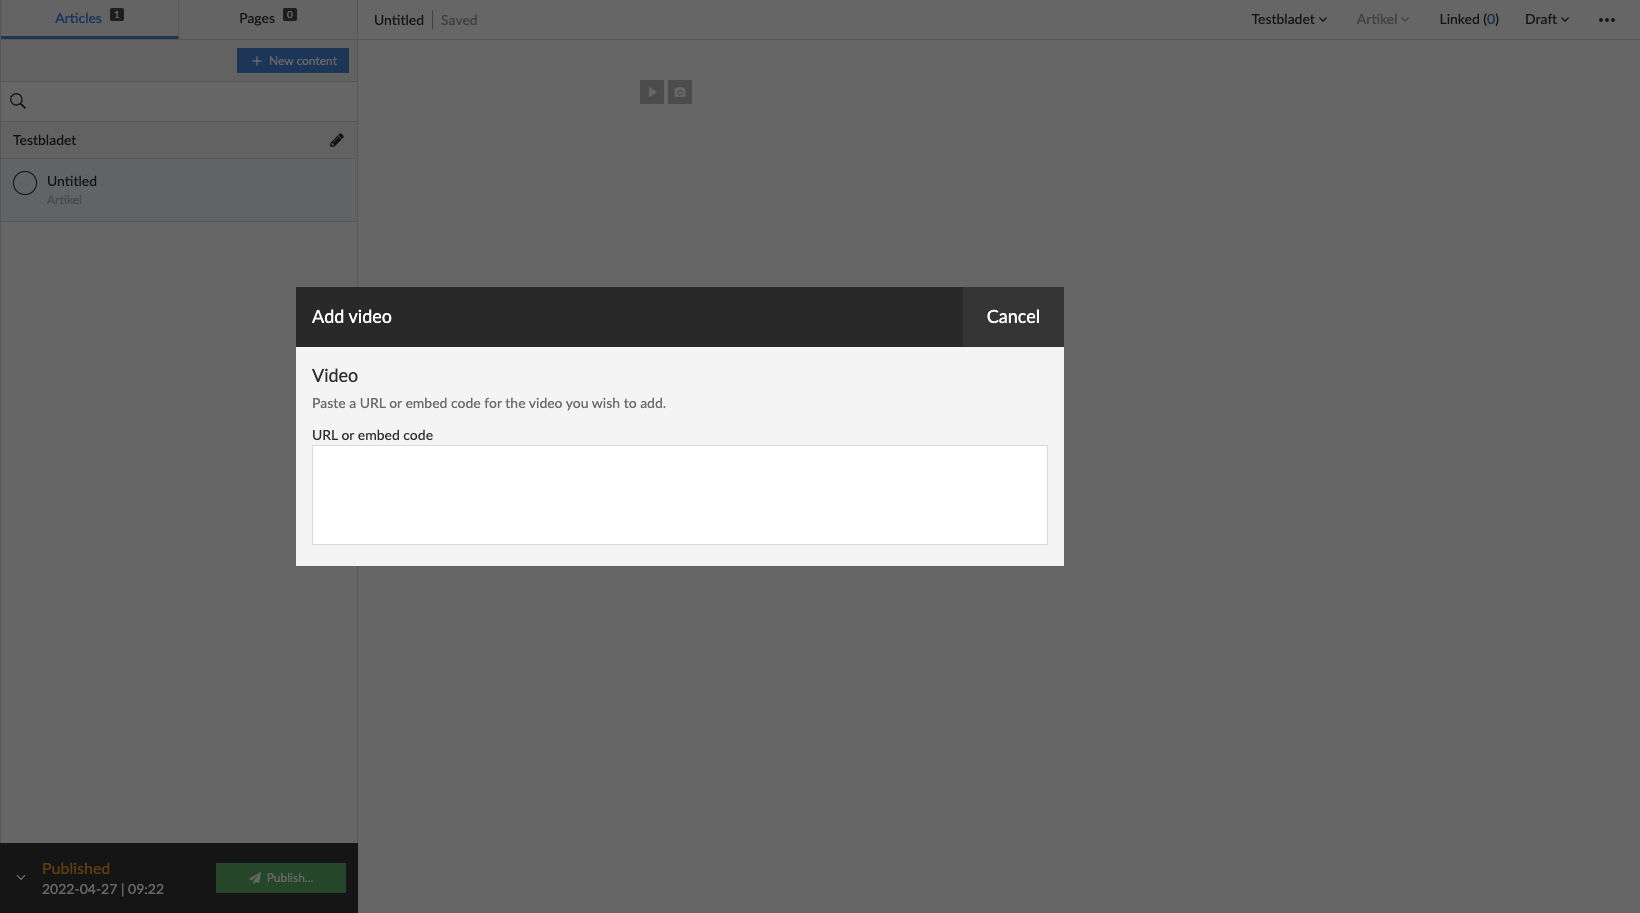 Enter a video URL, e.g. a YouTube-URL.
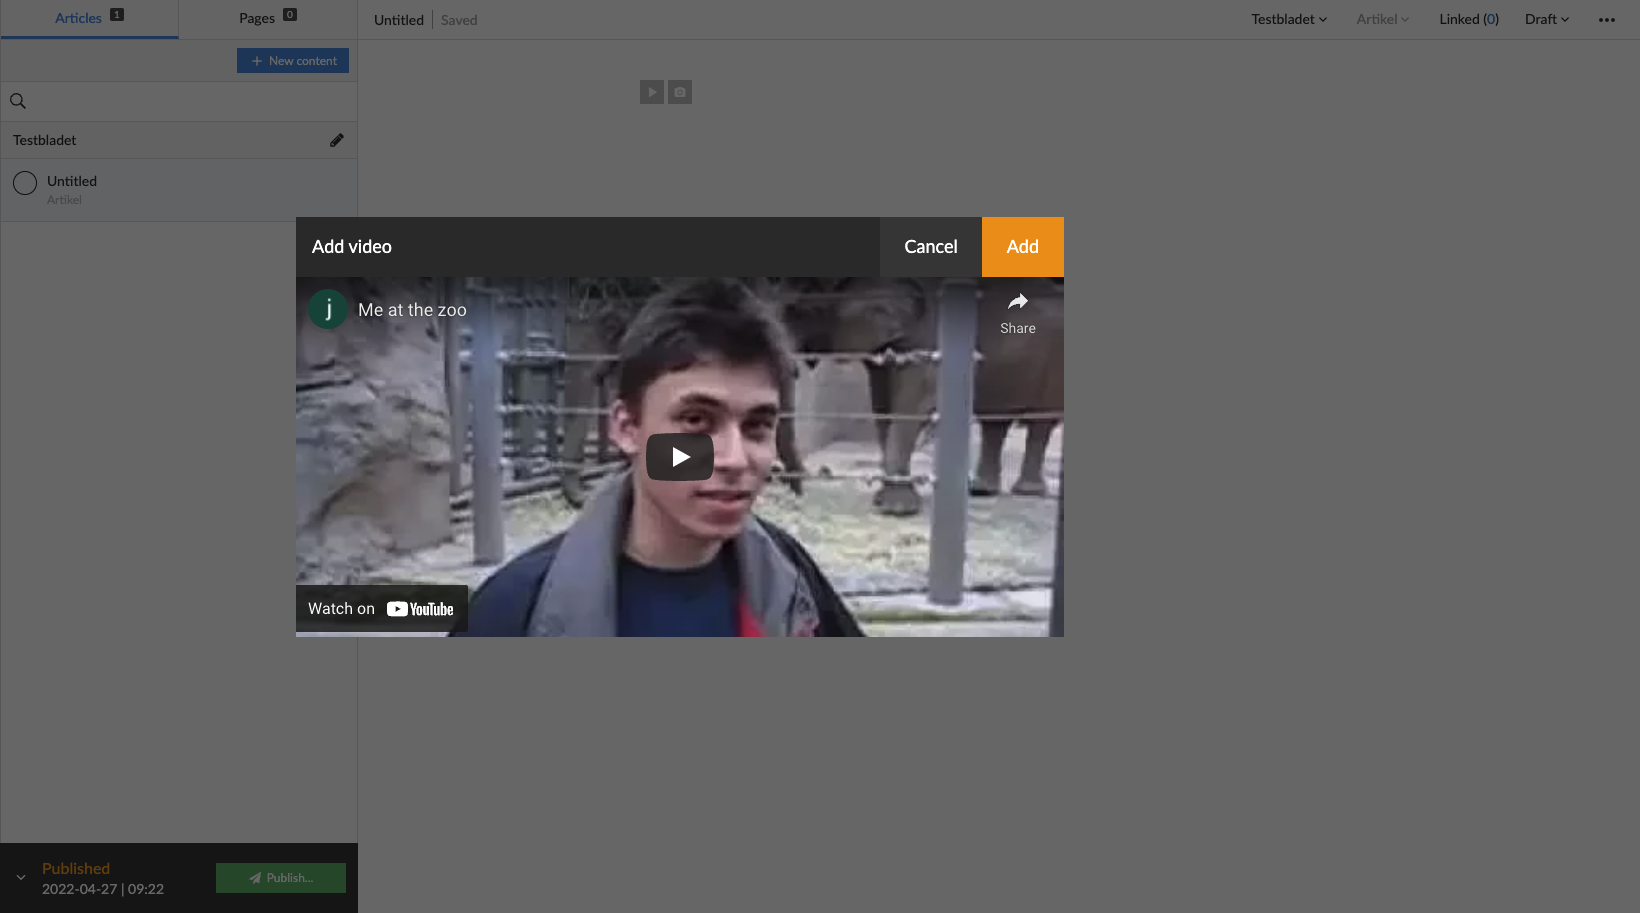 View over completed background setup. Select "Add" to add the video.
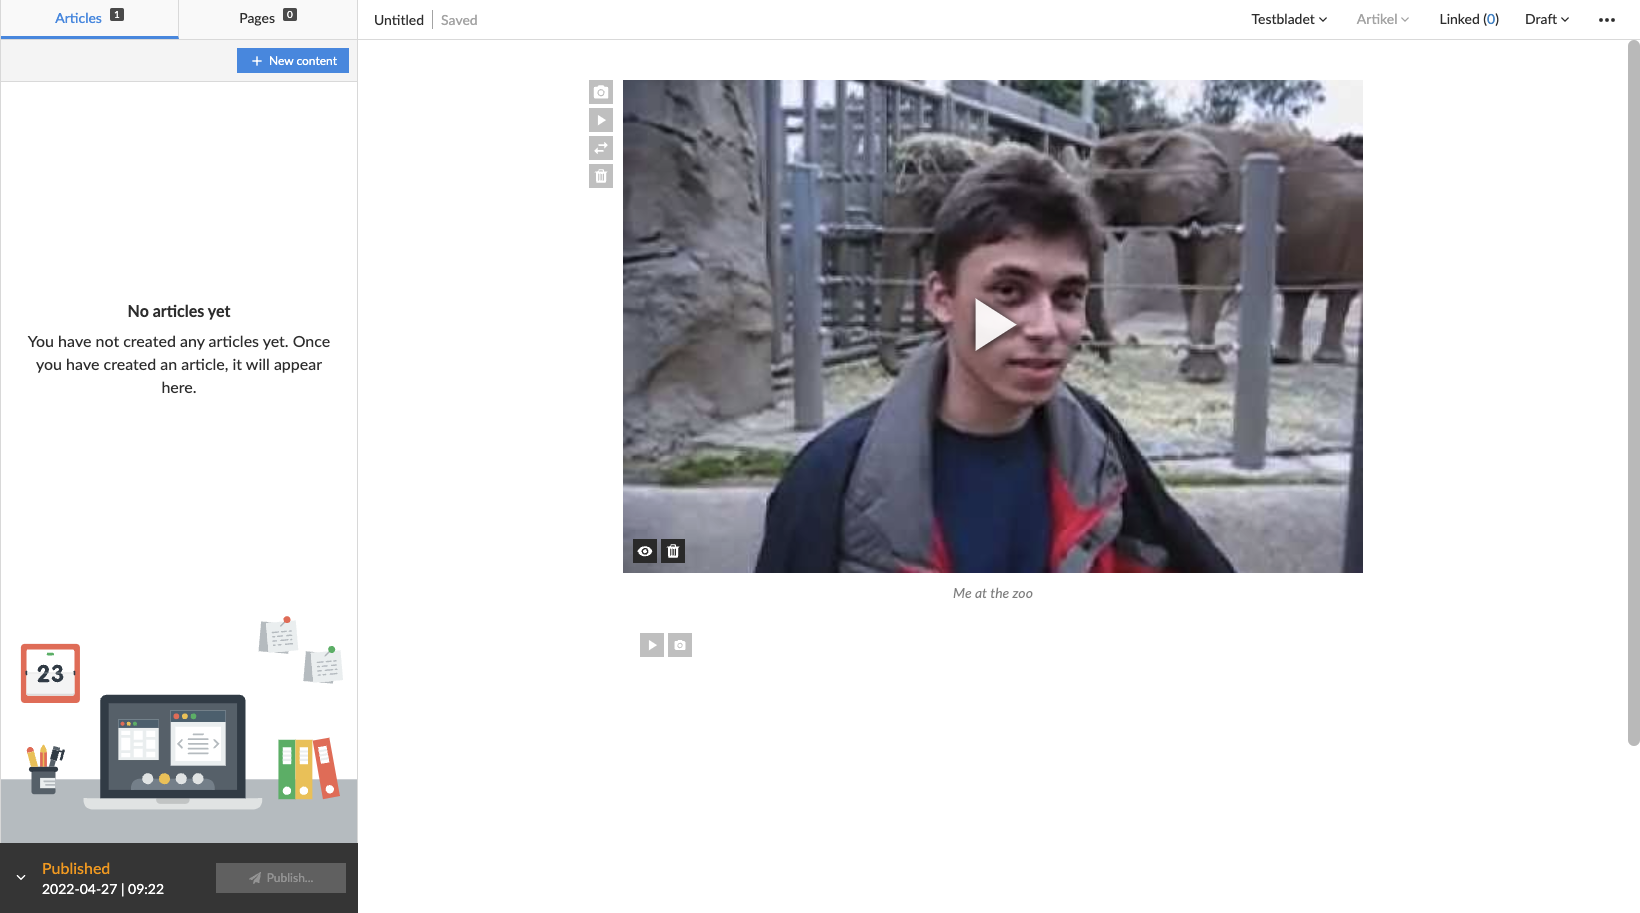 View over a new video media container added to the article.
Image
Once in the media container, to upload new images select "Browse" to open a file-handler on your local device or select images on your local file-handler and drag-and-drop them to the designated area. After you have selected your new image Prenly will close the media modal and add your new image to the image container.
To add an image description, select the description area under the image by touching the area immediately underneath and start entering your image description.
You may also re-add previously added images to the article or publication by selecting "Article images" or "Issue images" in the mini-menu in the image media modal. Prenly will assume you want to add new images and automatically select the mini-menu option to "Upload images".
 Select "Add image" to add a new image media container.
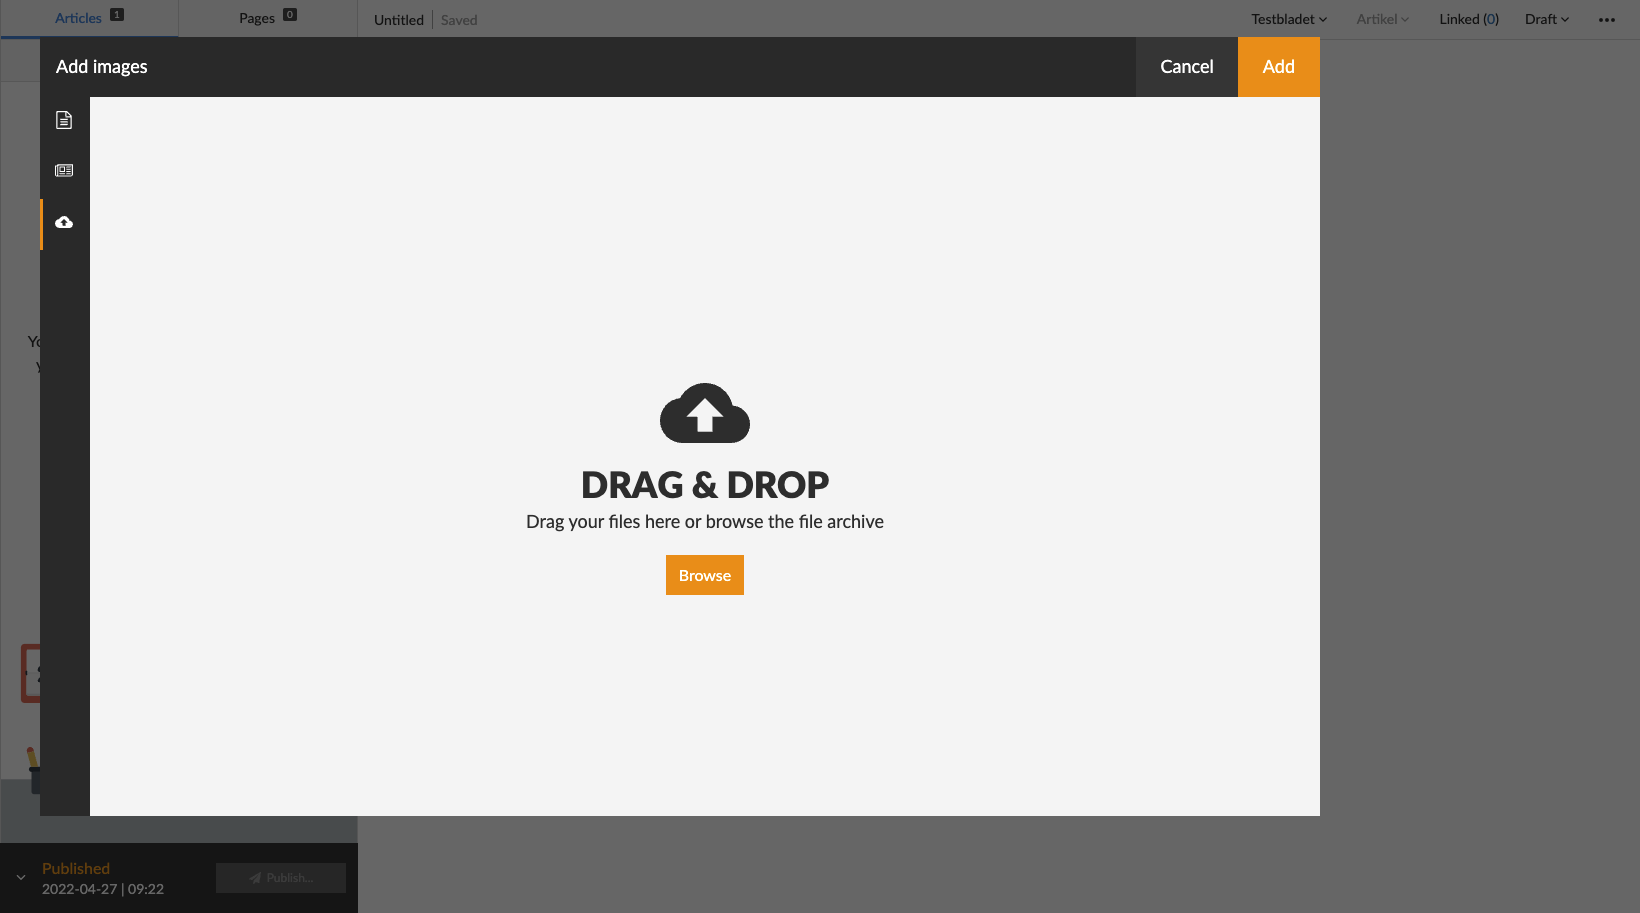 Drag-and-drop an image to add it, or select "Browse" to open a local file-handler on your device.
 View over a new image media container added to the article.
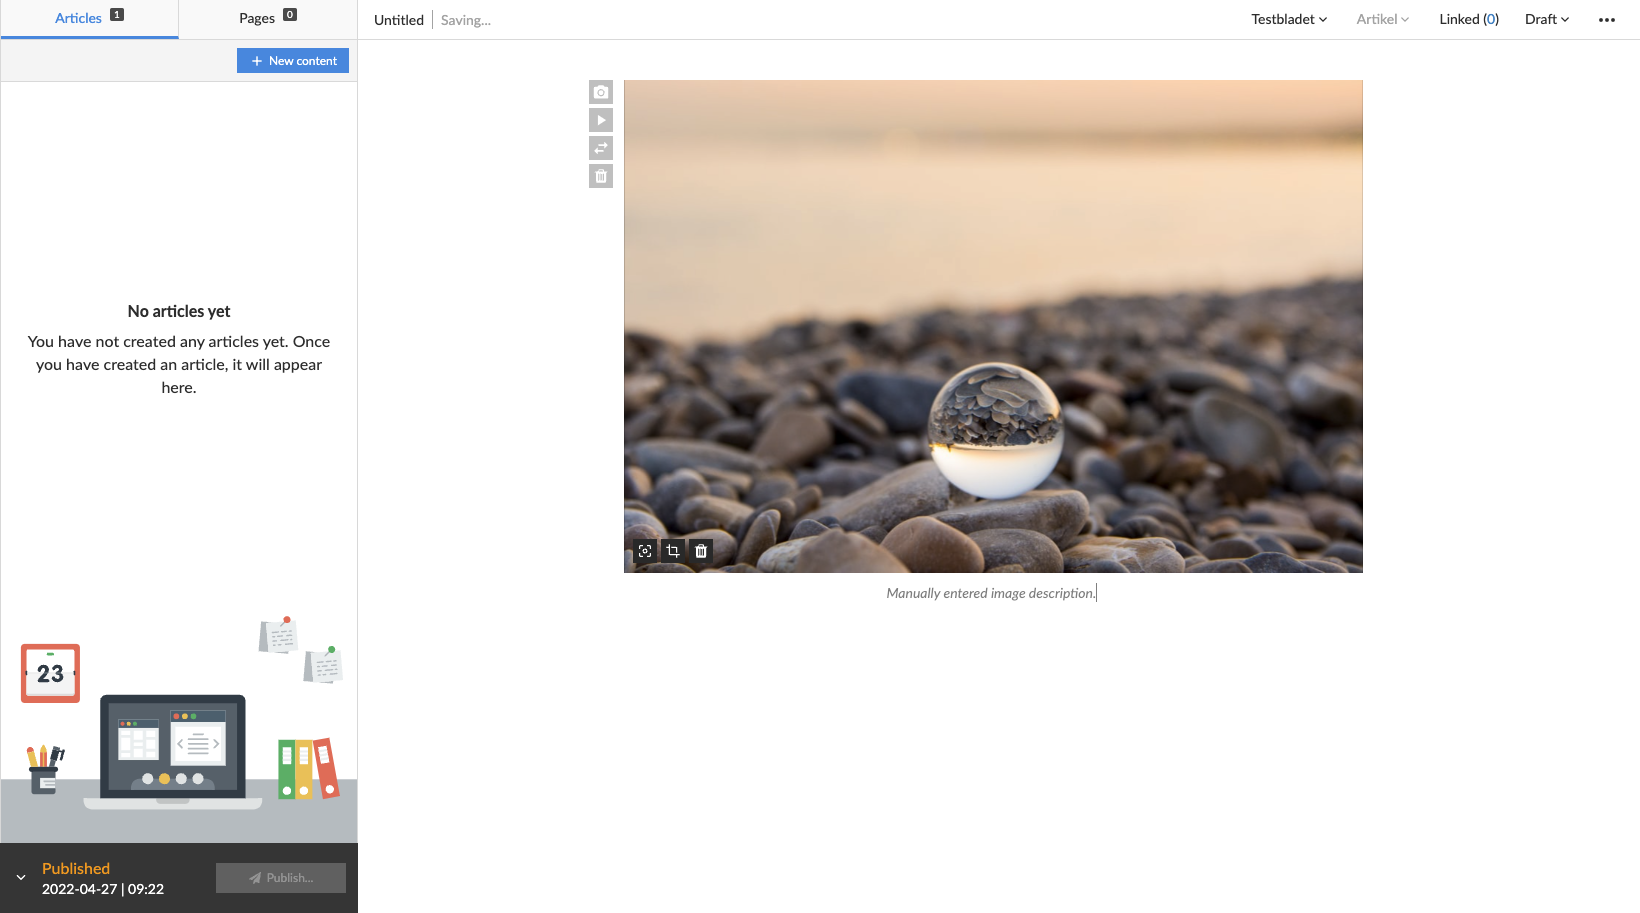 View over added image description to the current image within the added image media container.
Text
Enter text to create a new text fragment. Once a text fragment has been created you can change its type by selecting a new type in the left-hand drop-down menu. By default, Prenly will assume that your text fragment is an article body.
Prenly supports the following text fragments:
* Vignette;
* Heading 1;
* Heading 2;
* Heading 3;
* Heading 4;
* Heading 5;
* Heading 6;
* Lead;
* Body;
* Quote;
* Byline;
"Heading 1" is the largest headline often usable as the article primary headline. Heading 2 to Heading 6 is sub-headings.
Section
When you write an article Prenly will place it in a section. By default, Prenly will use the default section – which is named as the current selected Prenly title.
Change the section the article belongs to by selecting the section in the article status bar and selecting the new section.
You can create a new section by selecting the section in the status bar and create a new section by selecting "+ New section". You will be asked to set a name for your new section. You can also set section colours, which is an optional attribute. The section colours will be displayed in the article reading mode in the Prenly Android, iOS, and Web Reader. The article will automatically be transferred to the new section. If the GUI does not reflect the change immediately, please reload.
Article category
By default, your new article will be created as an Article category. If you have more types available to select from, you can select a new type from the article status bar.
To add a new article category you have to be an owner of your Prenly Workspace and add new article types to the Prenly title.
Common article content types are Article, Teaser, and Article part (e.g. sidebars or notes). Any article part can be further added as linked article content.
Linked content
You can add linked content to your article by selecting Linked in the status bar. A new modal will appear where you can select the content to add as linked content.
Select the content you want to link. Your content will be sorted into article category type and thereafter article section; unfold the drop-down menu of the desired article category and select the content from the desired section by touching the content's name or the "+" symbol.
When a linked content is added it will be removed from the article list and added as linked content to the parent article. The status bar will update to reflect that you have added new linked content to the active article. To edit the linked content, select the Linked in the status bar and from the drop-down menu select the linked article you want to edit.
To remove a linked content select the Linked status bar and from the drop-down menu select "X" adjacent to the linked article content. If the removed linked content is no longer linked content to any articles within the publication it will return to the article list.
Approve article to be available to publish
To be able to publish your article you will have to approve it to be publishable.
By standard, when an article is first created, its status is set to "Draft". Prenly supports three statuses; "Draft", "Approved", and "Stopped". You are free to change an article's status via the status bar by selecting the drop-down menu for it.
An article set as "Draft" is editable. If you want to edit an article you must first set it in "Draft".
An article set as "Stopped" is uneditable and not publishable.
An article set as "Approved" is uneditable and able to be published. To publish the current version of the article, however, you need to create a new publication version by selecting to publish your currently active version.
Article versions
Prenly Editor will show the currently selected version of your selected article by default. You may select an older version (or a newer version) by selecting the three-dot menu in the status bar and in the drop-down menu select "History" followed by the version you want to set as the active article version.
When you select to publish a new publication version, only the approved articles' current versions will be available for publishing. If you want to change which article is published you will first have to select in the article's History which version to publish, by selecting which article version is the current version.