Create a digital publication - Prenly
Our digital e-magazine platform offers an efficient and engaging way to distribute content to your readers.
Here we will guide you through how to create a digital publication in Prenly from scratch.
1. Log in
First of all, you need to have an account with editor role in Prenly Workspace. Then log in via this page: https://content.textalk.se
2. Start creating
- From the left menu select "Titles" followed by the title you wish to create your new publication.
Contact support if you need help creating a brand new digital title.
- Then select the orange Create Publication button to start creating your digital publication. If you are on a smaller device, select "+".
 Create publication
Enter a name for your new publication, a publication date, and the required read permissions.
Tags are used for special packages, read more about how it works here.
Click Create.
3. Adding articles
Now is the time to start filling our new digital publication with articles. You can either create brand new articles or copy from existing publications using article mode.
Create new article
- Select the articles tab and click the button New Content > New Article
- Enter the title and text and add any images or videos. Format text paragraphs by clicking the format selector to the left of the text block.
 Format text
See also this guide that describes more about how to write in Prenly.
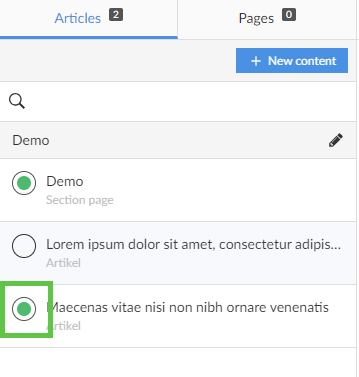
- When you are finished with your article, you need to change the status from Draft to Approved in the menu in the upper right corner. It is also possible to click in the empty circle to the left of the article's name in the articles tab so that it turns green, which also sets the article to approved status.
 Approved
Copy an article from an existing publication
- Select a publication that contains the article you want to copy to your digital publication.
- In the Articles tab, highlight the article by clicking on it.
Keep in mind that not all releases need to have articles.
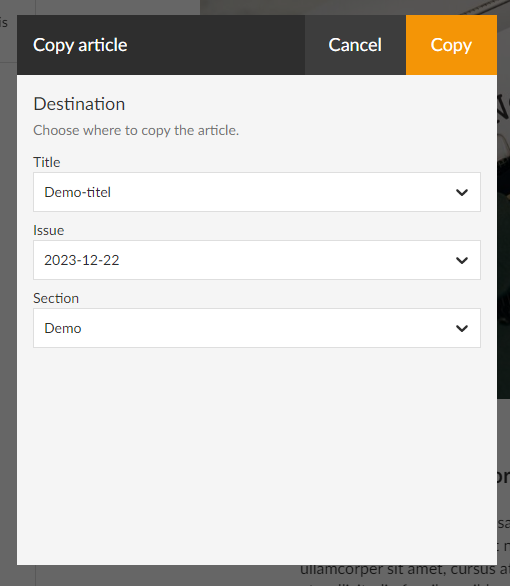
- Click on the three-dot menu in the upper right corner and select Copy.
- Select the title you want to copy this article to, in this case our supplement "Extra digital". Also choose which edition and section. If all choices are filled in and the article can be copied, the Copy button will appear.
 Copy an article
4. Create section page
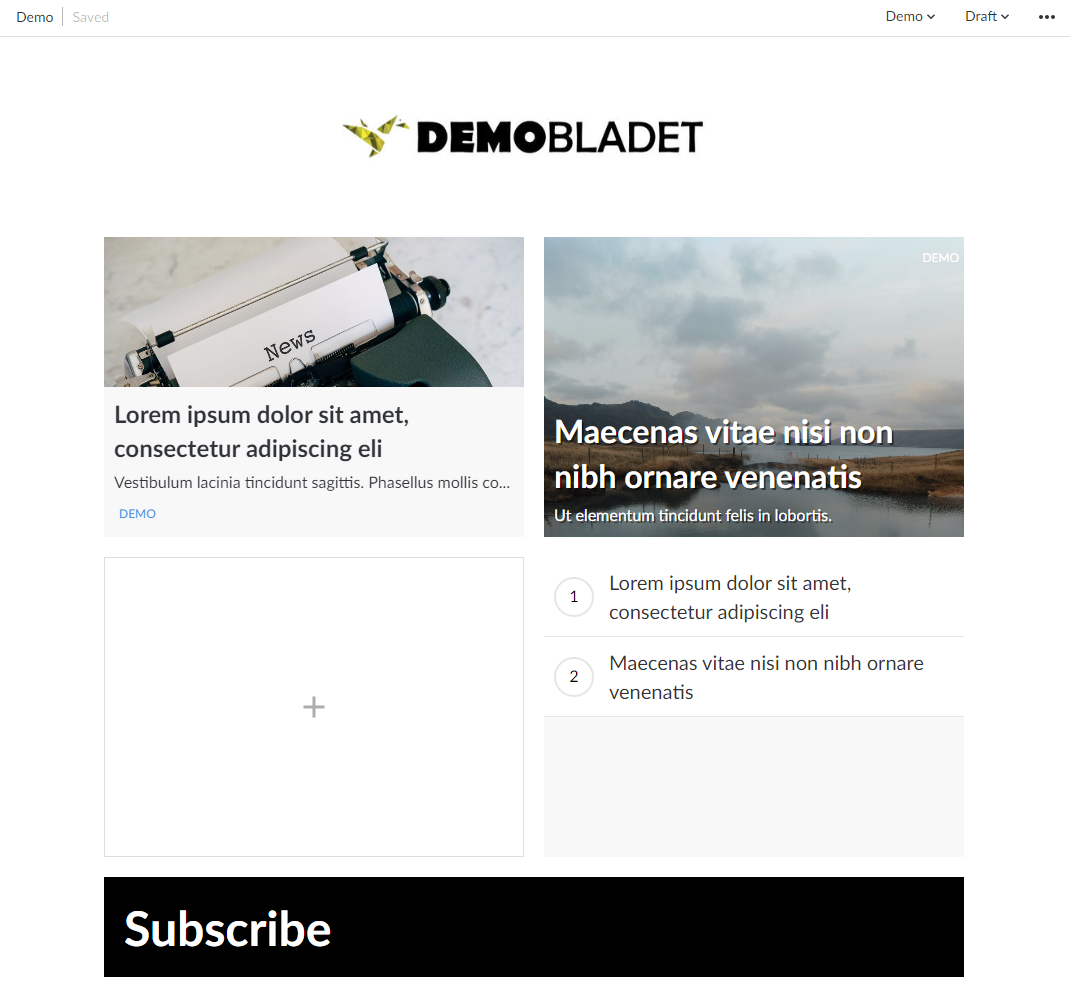
Under the articles tab and the blue New Content button, you can also choose to create a section page. It is a selection of templates for a layout page with different numbers of columns and rows in blocks that you can use, for example, to create a front page.
 Layout
You can upload a logo, change colors, create puffs, display dates, etc
When you are finished with your section page, set it as approved according to previous instructions.
5. Publish edition
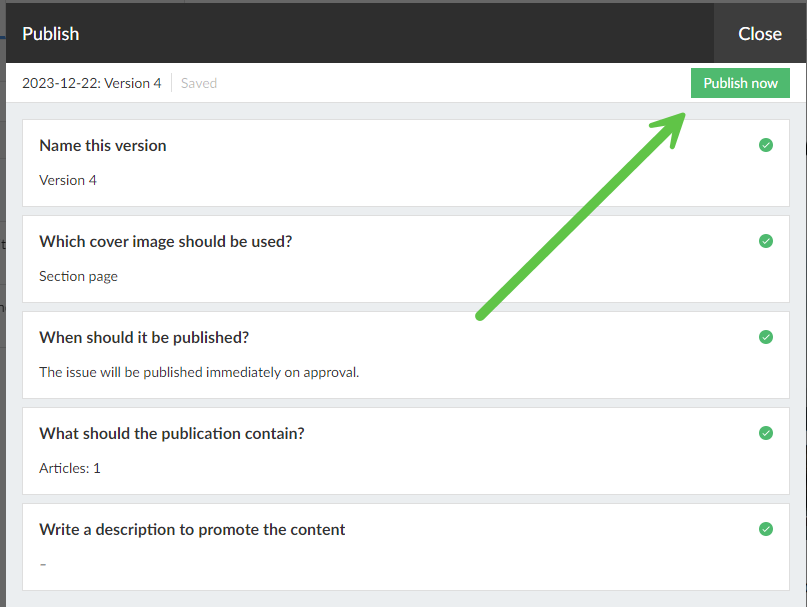
Now is the time to publish this new publication. Click the green Publish button below the articles and go through all the steps:
Name version: Ex version 1
Choose cover image: Choose between standard image (a blank front page), a section page (if you created one) or upload an image for your own cover.
Enter publication date and time: Choose between Now or schedule
What should the publication contain: Mark the articles to be included by marking the circle so that it turns orange.
Write a description: Optional. This text becomes visible if you use a so-called notice or hero component to display the publication on the start page.
When all the steps above are clearly marked, you are also ready to publish - click the green button Publish now.
If you have chosen a date further in the future, click on Schedule for publication.
 Publish now
6. Add the publication to your homepage
The last thing we do is present our new publication on our home page so it becomes available to all readers.
Click on your application in the menu and go to application settings. Add the new title. See also our application settings guide.
Open the home page and create a new block with, for example, a Carousel or Hero to display the publication. Read more in our guide on how to build your startpage.
Save and publish!