Configure Analytics – Custom Definitions - Prenly
Each event contains additional data in the form of event parameters. An event can be seen as something that happened, but if you want more information, you need to look at the event parameters.
For example, if you are interested in the exposure of articles in article reading mode, you can look at the event data. On the other hand, if you are interested in seeing which articles have been exposed, you need to look at the event parameters associated with the event to get the answer.
Google Analytics will by default list the available events. If you want to see the event parameter data, you will need to configure your Analytics, where it will take Google Analytics up to 48 hours to make the change take effect. By configuring Analytics to show the event parameters associated with an event, you can filter the data and view aggregated graphs per event parameter.
To configure Google Analytics to expose event parameters, you must configure custom definitions and custom metrics.
Configuring custom definitions
Step 1. Select the Google Analytics property to configure.

Step 2. In the menu on the left, select Admin (the cog).
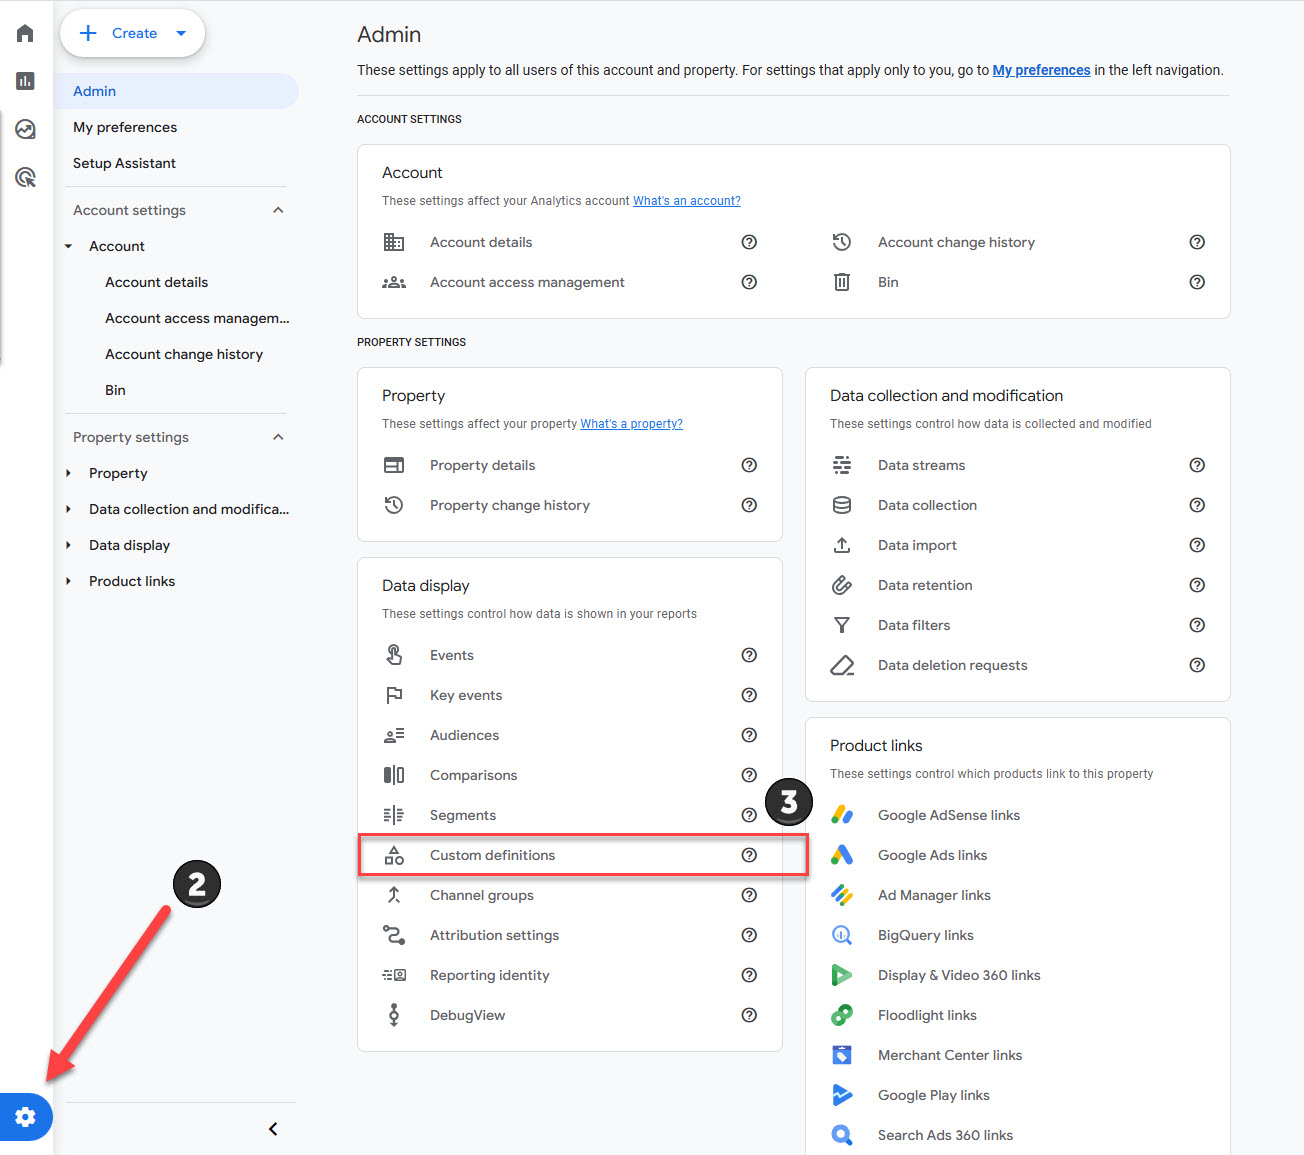
Step 3. Select Custom definitions in the property column.
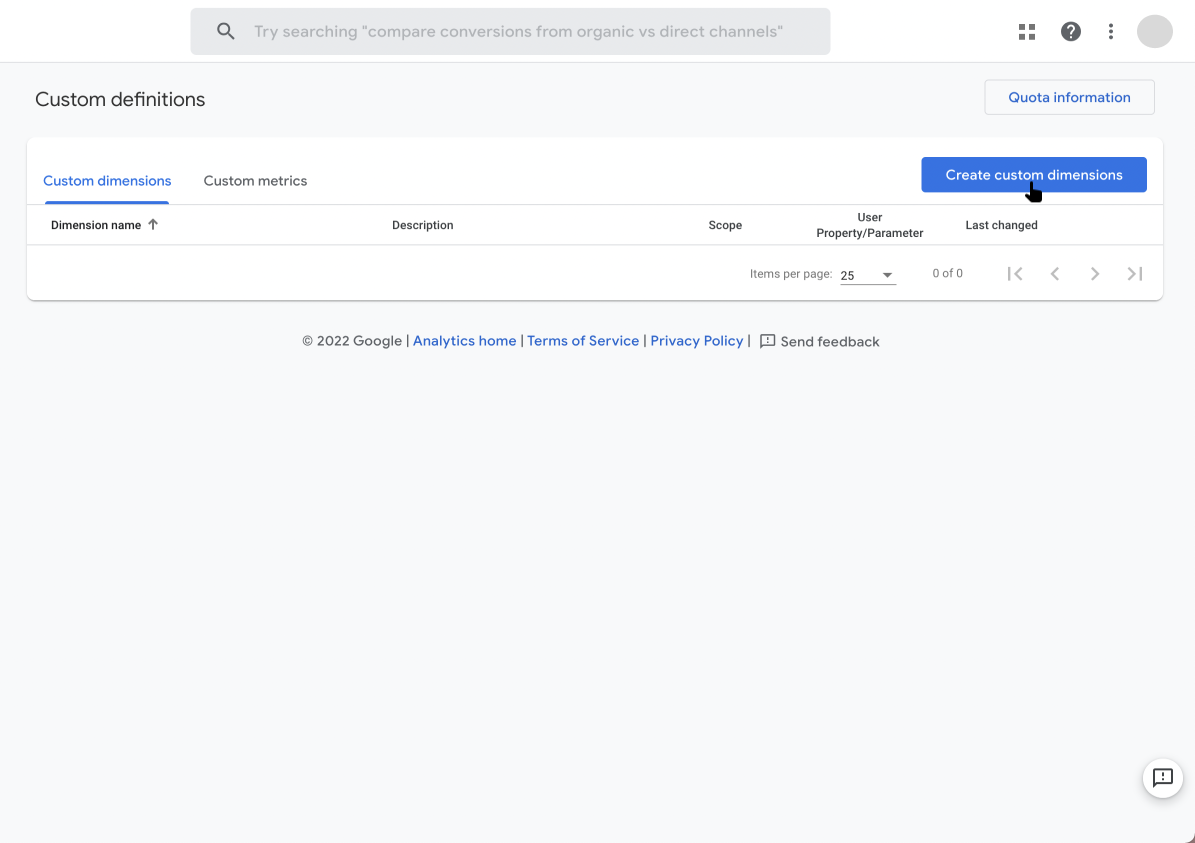
Step 4. Select Create custom dimensions to create a new custom dimension.
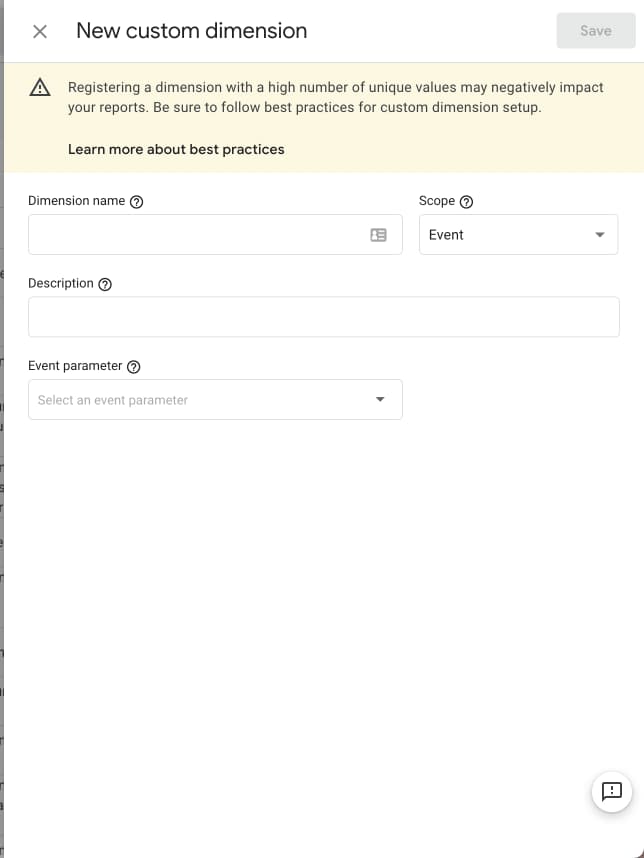
Step 5.
Dimension name: Enter the name you want. This will be displayed in the report data
Scope: Must be set to "Event"
Description: Optional: Optional. You can add a description for the event parameter.
Event parameter: The parameter must be identical to the dimension of the event parameter, e.g. "article_slug".
Once the above has been set, save the settings by selecting "Save".
You can find the dimension of the event parameter by selecting an event on https://wiki.prenly.com/en/user-analytics/events, e.g. select the event article_open(https://wiki.prenly.com/en/user-analytics/events/article_open) and look in the column "dimension". You can also find the description for the event parameter by viewing the "description" column.
Repeat steps four and five for each event parameter you want to configure.
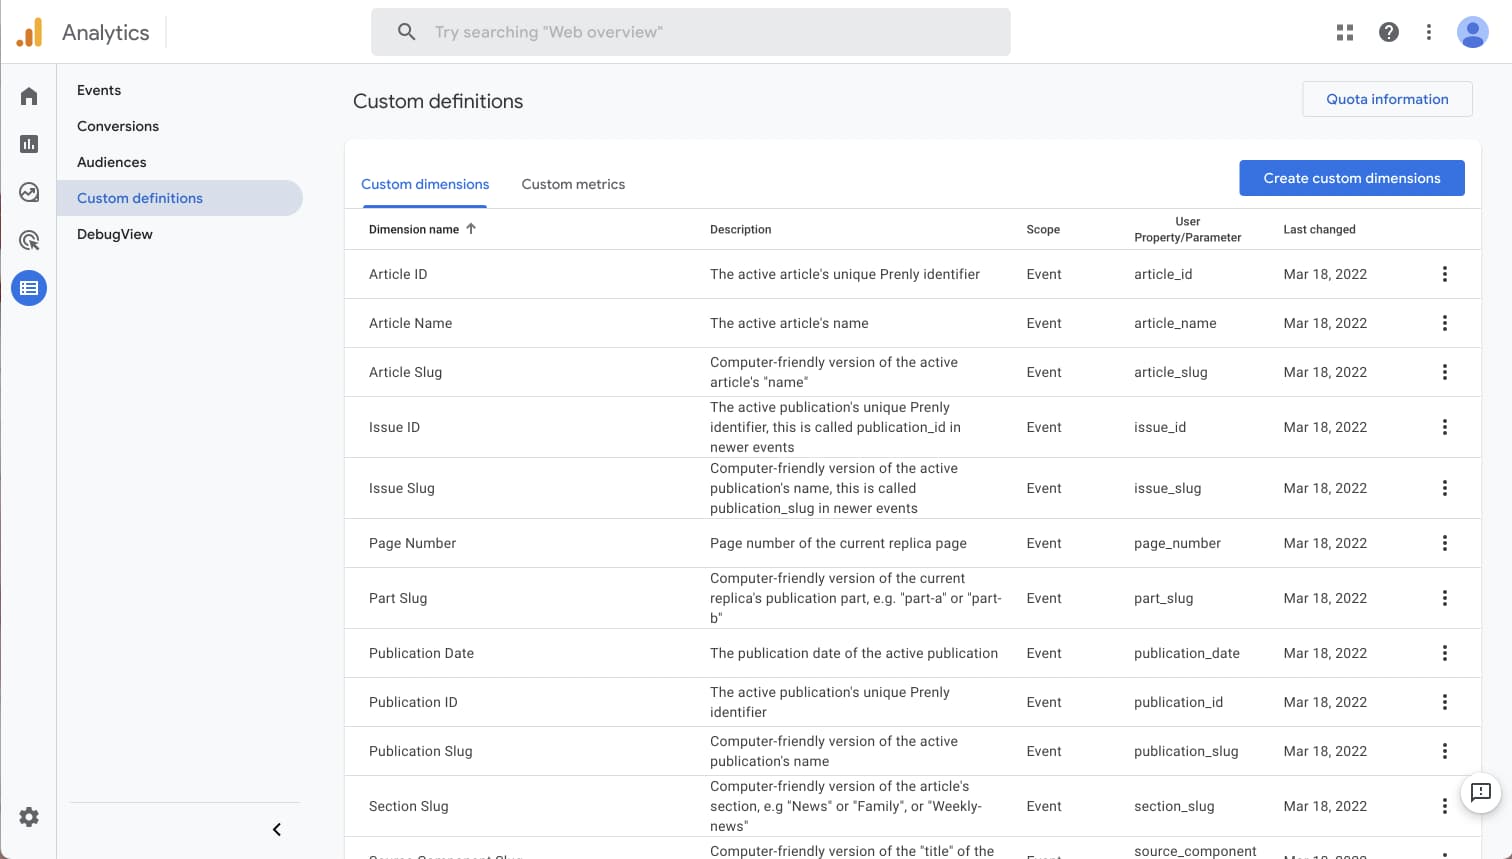
Below you can see an example of a setup for your Analytics.
Once you have configured your Analytics, it will take Google up to 48 hours for the change to take effect.
Please note that some event parameters ("time_spent" and "played_duration") need to be defined as "Custom metric" rather than "Custom dimensions". This is important to ensure that their values are aggregated.
Additional bonus
An added bonus after configuring your Analytics to expose the event parameters is that you can create a custom report via Looker Studio. By creating a custom report through Looker Studio, you have more control over what data you want to expose and can customize where and how you want to display the data.